TrueContext Quick Start
This topic has everything you need to know to get started with TrueContext. Follow the steps to create and submit your first TrueContext form.
Info:Don't have an account yet? Go to the TrueContext website to request a demo.
Available on all tiers:
Contents
Download the Mobile App
-
Go to your device's app store.
-
Search for truecontext and download the app.
-
Open the app and sign in.
Notice the four main sections:
-
Forms—includes a list of all the forms available for you to fill out.
-
Inbox—includes all the forms your supervisor dispatched for you to work on.
-
Drafts—includes all the forms you partially completed and saved as drafts.
-
Sent—includes all your submitted forms.
-
Build a form
Create a new form
-
Go to the Web Portal, and sign in.
- Go to Forms & Integrations > Create New Form, and then select Build a Mobile Form.
- Enter a name for your form. For this example, use the name Site Inspection.
-
Select Save.
Result: The Form Builder opens with a default page, a default section, and a default question.
Note:Each page must have at least one section, and each section must have at least one question.
-
Change the name of the default page and section:
-
Select the menu next to the page or section name as shown in the following image.
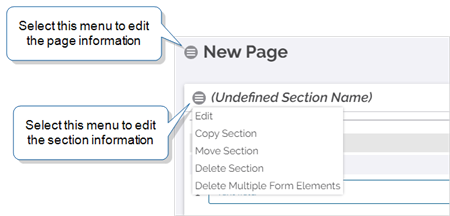
- Select Edit.
- Name the page Customer Information, and the section Contact Information.
- Select SAVE.
-
Add Questions to your form
-
In the Form Builder, select ADD A QUESTION.
Result: The Question menu opens.
- Select Text Field as the control type.
-
In the Question Text field, enter Company Name and select SAVE.
Result: You created your first question.
-
Add four more questions with the Text Field question type. In the Question field, enter:
- Address
- Contact Name
- Phone Number
Tip:You can delete questions by selecting the menu next to the question text. You can also select Delete Multiple Form Elements to delete several questions at once.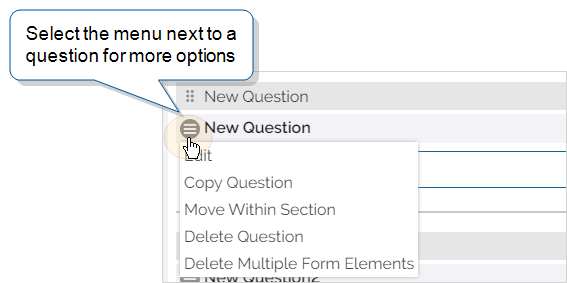
The topic Form Building Basics: Delete Multiple Form Elements describes how to delete multiple form elements in more detail.
Save and deploy your form
-
Select SAVE AND DEPLOY.
Result: The system prompts you to confirm that you want to deploy the form.
-
Select DEPLOY.
Result: The system makes the form available in your Mobile App.
-
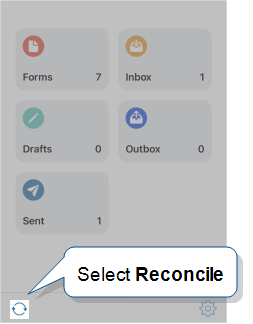
Result: Your form is now visible in the Forms section of your Mobile App.
Submit a form
-
Open the TrueContext Mobile App.
-
Select Forms.
Result: The Forms page opens with a list of all your available forms.
-
Select the new form you created, Site Inspection.
-
Select the Customer Information page.
-
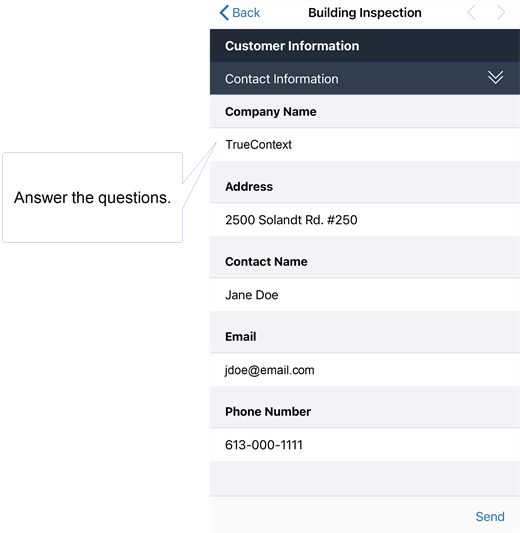
Answer the questions in the form. The following is an example of the form filled out.
-
Select Send.
Result: The Mobile App prompts you to confirm that you want to send your form.
-
Select Send to confirm.
Result: The Mobile App confirms your submission.
View your submitted form
-
Go to the Web Portal and sign in.
-
Go to
Data & Analytics > Submissions (by Form) > FormName > Continue
or
Forms & Integrations > FormName > Go to submissions
Result: The Web Portal displays the Form Submissions page for the selected form. By default, The Form Submissions page displays form submissions from the last 30 days.
-
Select the Reference Number of your Form Submission as shown in the following image.
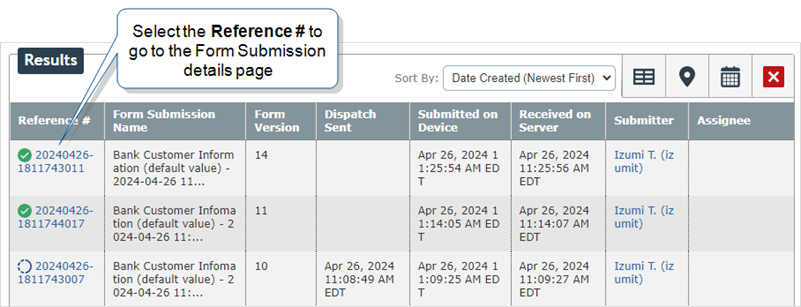
Result: The Form Submission details page opens. In this page, you can see all the answers you submitted from your mobile device.