Set Up Active Directory Federation Services (ADFS) for TrueContext Single Sign-On
Available on the Intelligent and Elite tiers:
About
Single Sign-On![]() A corporate login (also Single Sign-On or SSO) allows users to sign into the TrueContext Web Portal and apps by authenticating the user's login through an identity provider (IdP), such as Okta or OneLogin. Users must initiate SSO from the TrueContext Web Portal or Mobile App. (SSO
A corporate login (also Single Sign-On or SSO) allows users to sign into the TrueContext Web Portal and apps by authenticating the user's login through an identity provider (IdP), such as Okta or OneLogin. Users must initiate SSO from the TrueContext Web Portal or Mobile App. (SSO![]() A corporate login (also Single Sign-On or SSO) allows users to sign into the TrueContext Web Portal and apps by authenticating the user's login through an identity provider (IdP), such as Okta or OneLogin. Users must initiate SSO from the TrueContext Web Portal or Mobile App.) allows your users to use their credentials from a secure Identity Provider (IdP) to log in to the TrueContext app. This can save time and frustration by reducing the number of passwords your mobile users have to enter on a daily basis, without sacrificing security.
A corporate login (also Single Sign-On or SSO) allows users to sign into the TrueContext Web Portal and apps by authenticating the user's login through an identity provider (IdP), such as Okta or OneLogin. Users must initiate SSO from the TrueContext Web Portal or Mobile App.) allows your users to use their credentials from a secure Identity Provider (IdP) to log in to the TrueContext app. This can save time and frustration by reducing the number of passwords your mobile users have to enter on a daily basis, without sacrificing security.
Active Directory Federation Services (ADFS) is a SSO solution created by Microsoft, and provides users with authenticated access to applications not capable of using Integrated Windows Authentication (IWA) through Active Directory (AD).
This article will walk you through the step to configure ADFS for a SSO integration with TrueContext.
Permissions Required
Setting this integration up requires access to the ADFS Management Console and the TrueContext Team Administration pages in the web portal. Please ensure you have access to, and permission to modify, the settings on these pages/consoles before beginning this process.
Setup
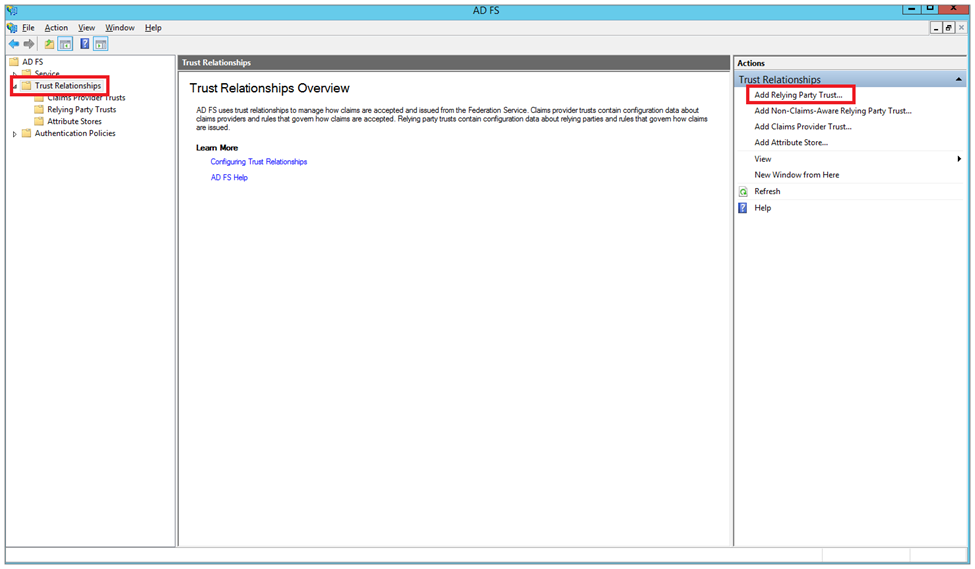
In ADFS
- Log onto the ADFS server and open the AD FS Management Console.
-
Select Trust Relationships from the left navigation bar, and select Add Relying Party Trust from the right navigation.
-
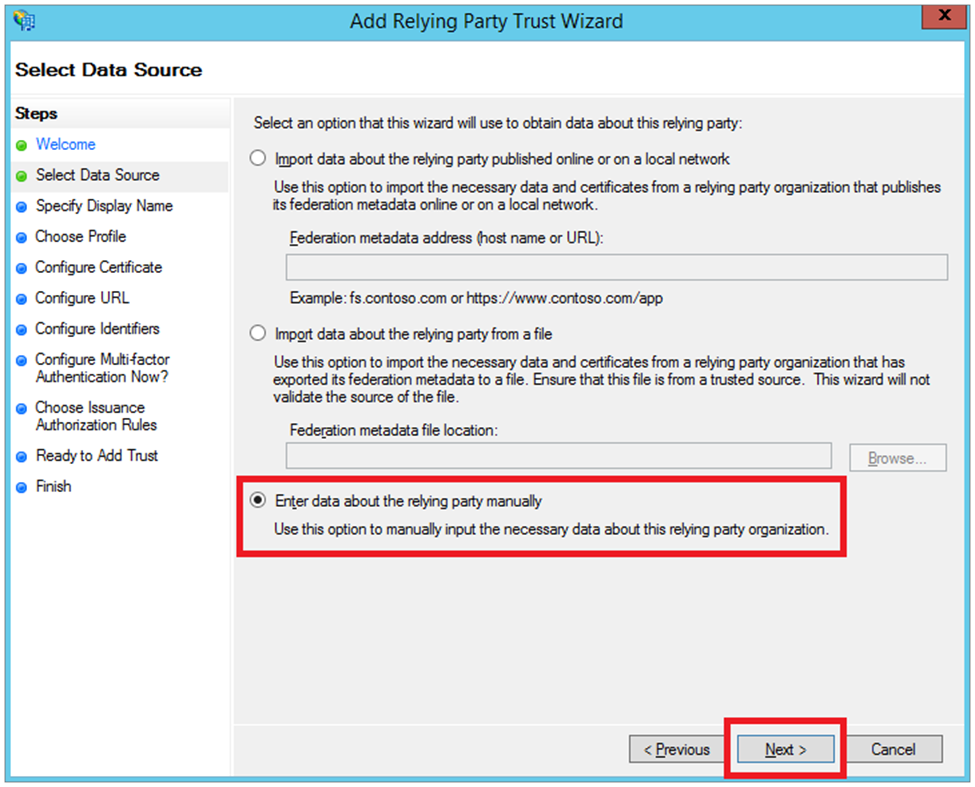
Follow the Add Relying Party Trust Wizard.

-
On the Select Data Source step, select Enter data about the relying party manually and select Next.
-
On the next screen, specify a Display name and select Next.

-
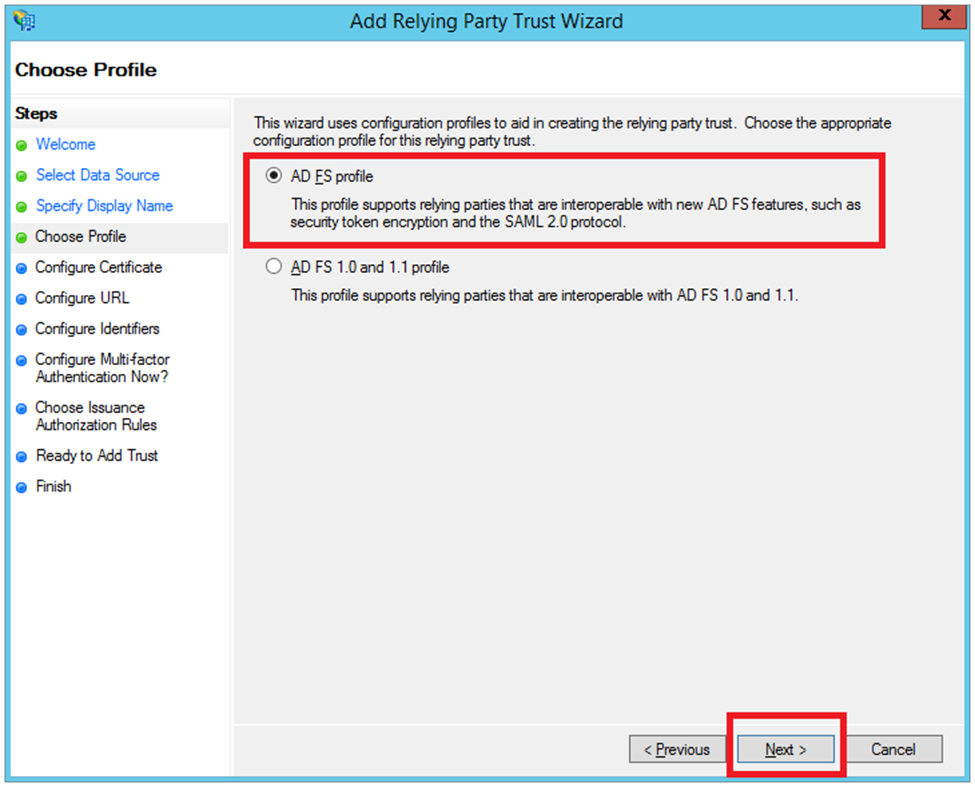
On the Choose Profile step, select AD FS profile.
- On the Configure Certificate step, simply hit Next. Do not configure a certificate.
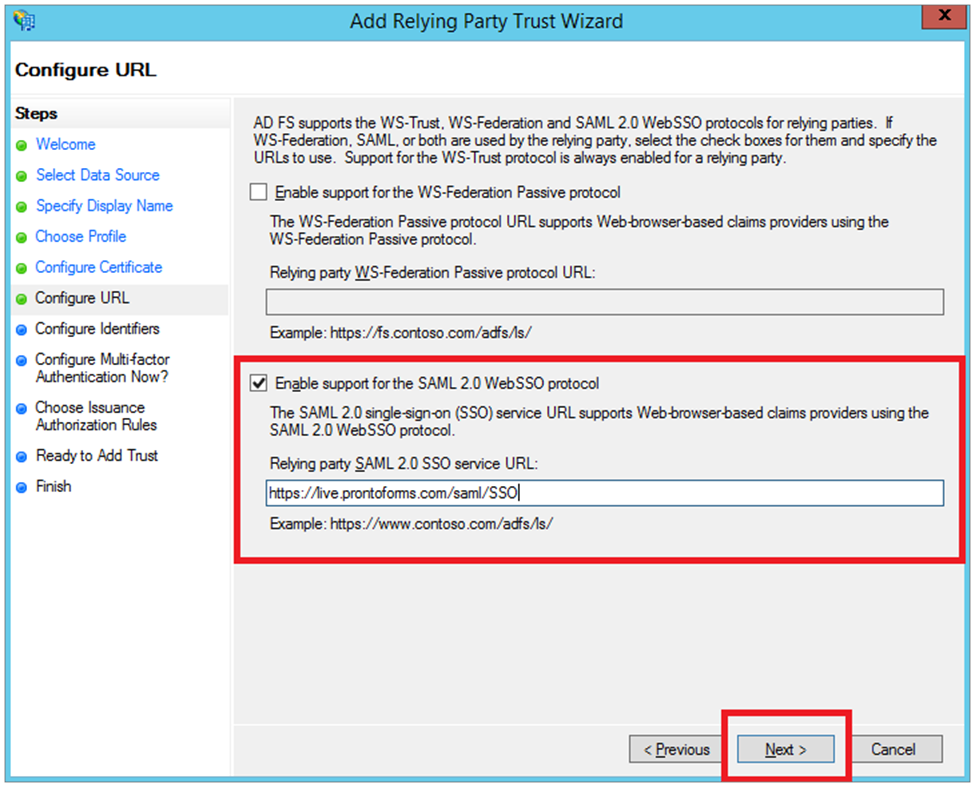
- On the Configure URL step, select Enable support for the SAML 2.0 WebSSO protocol and set the Relying Party SAML 2.0 SSO Service URL to:
https://live.prontoforms.com/saml/SSO
Info:We’re now TrueContext.To support existing integrations, some items will continue to use “prontoforms” or “pf” in the domain or code.
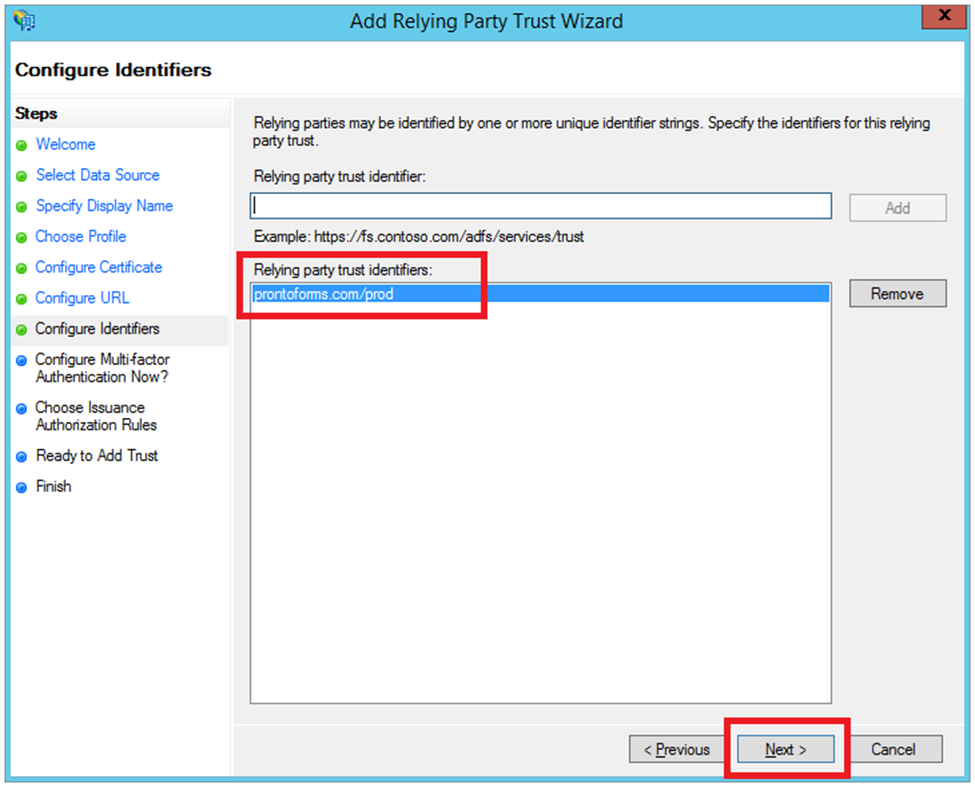
- On the Configure Identifiers step, add the relying party trust identifier:
prontoforms.com/prod
-
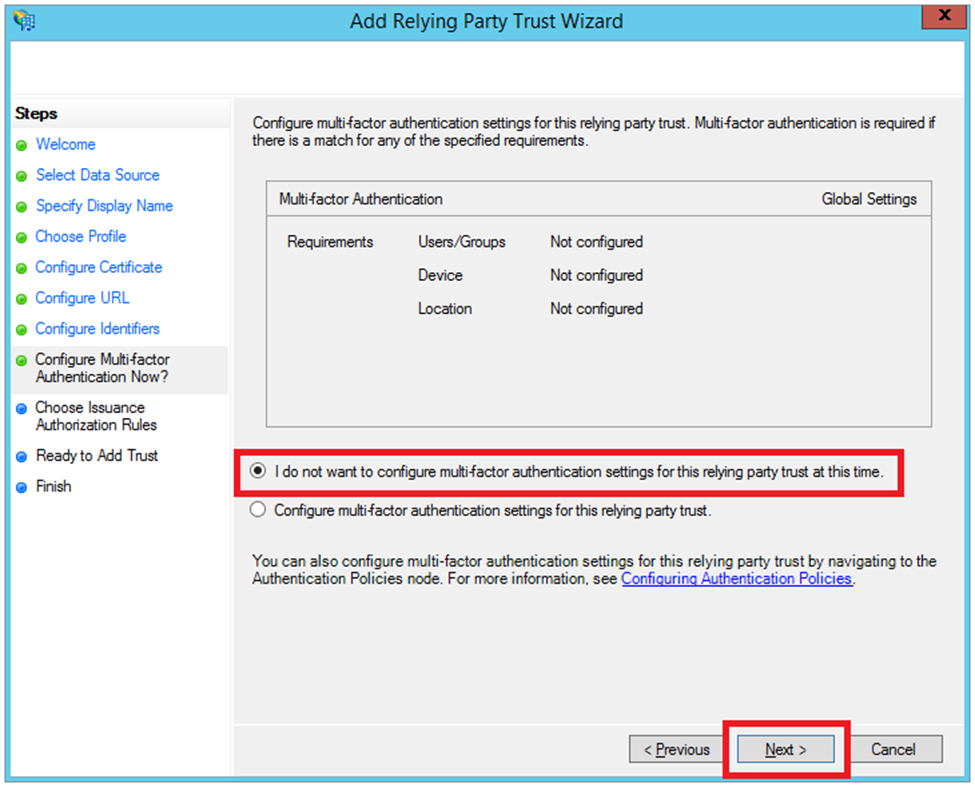
On the Configure Multi-Factor Authentication Now? step, select I do not want to configure multi-factor authentication settings for this relying party trust at this time.
-
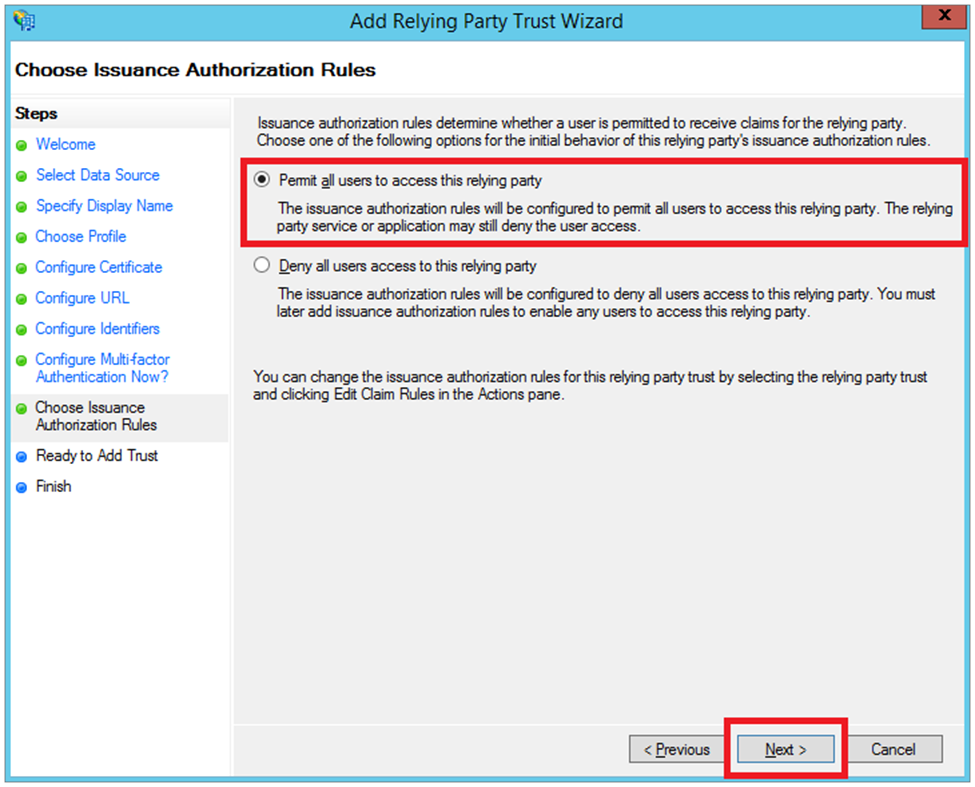
On the Choose Issuance Authorization Rules step, select Permit all users to access this relying party.
- On the Ready to Add Trust step, select Next to add the relying party trust.
-
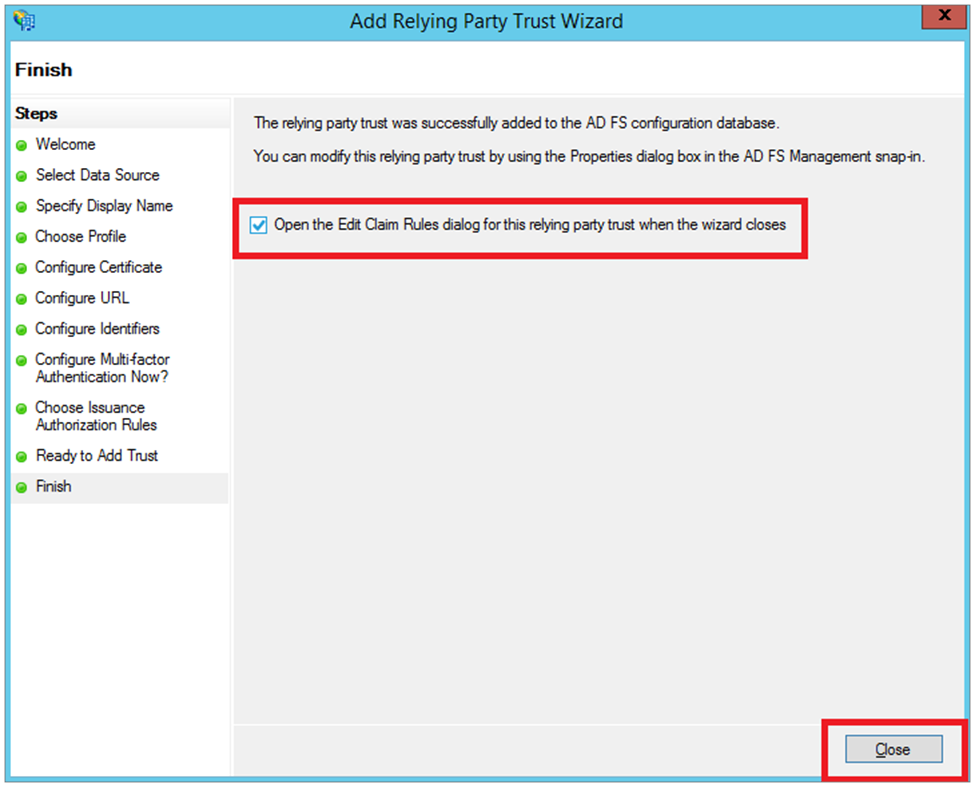
On the Finish step, select Open the Edit Claims Rules dialog for this relying party trust when the wizard closes.
-
In the Edit Claim Rules dialog, select Add Rule... to add a relying party trust claim rule
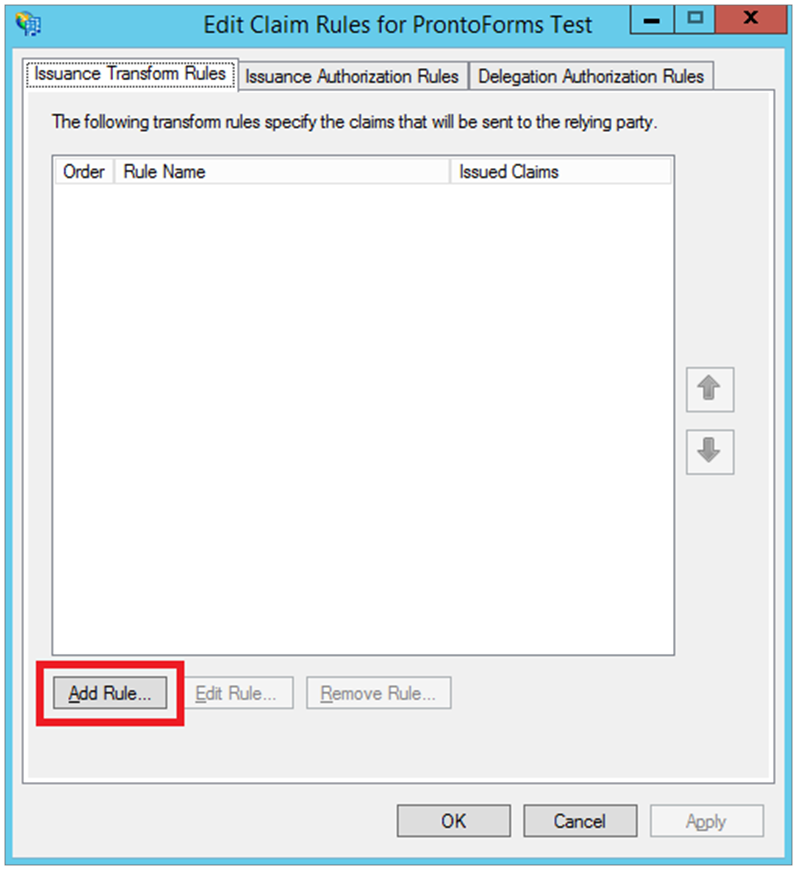
-
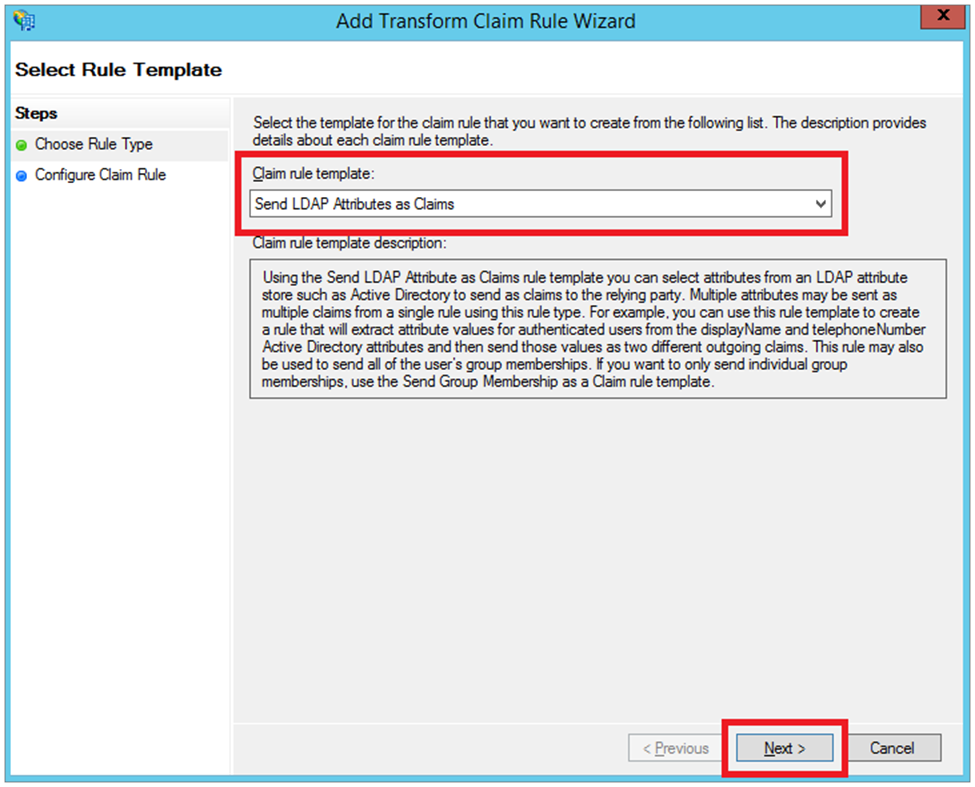
On the Choose Rule Type step, select Send LDAP Attributes as Claims from the dropdown.
-
On the Configure Claim Rule step, configure the rule to return a user's username from Active Directory upon SAML login. Once complete, select Finish to be returned to the Edit Claims Rules dialog.

-
On the Edit Claims Rules dialog, select OK to add the rule. This will return you to the AD FS Management window.

-
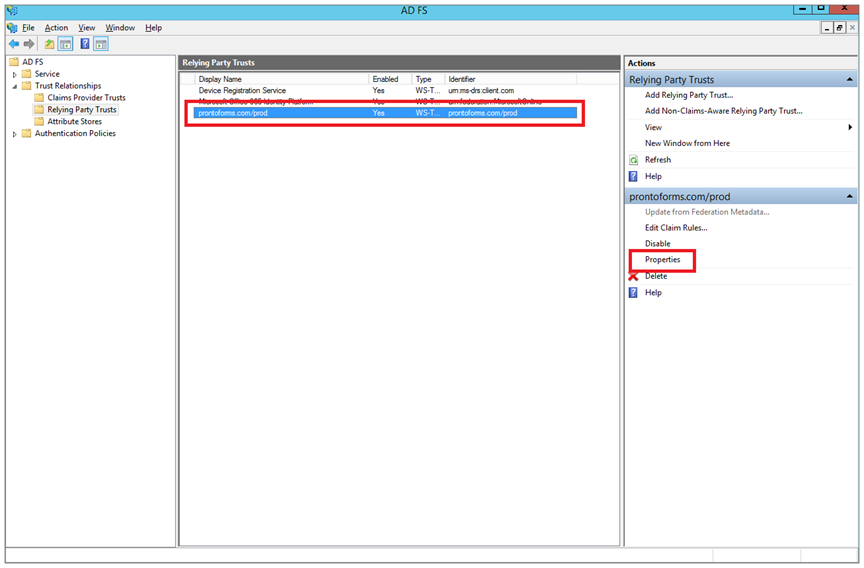
In the AD FS Management window, select your new Relying Party Trust, and click on Properties in the right-hand navigation pane.
-
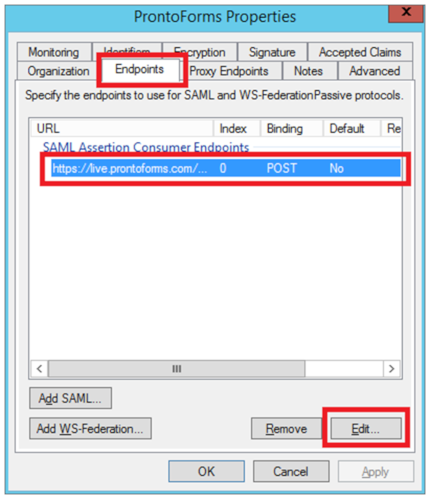
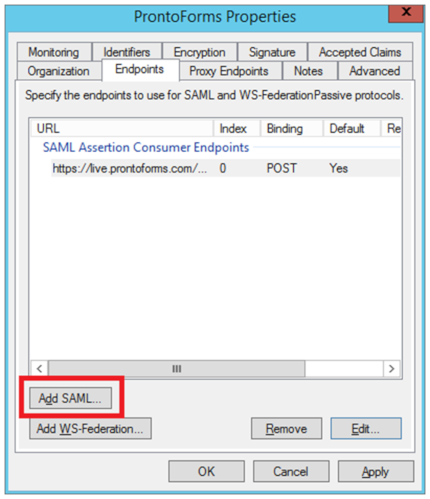
In the Properties window, select the Endpoints tab, select and Edit the endpoint.
-
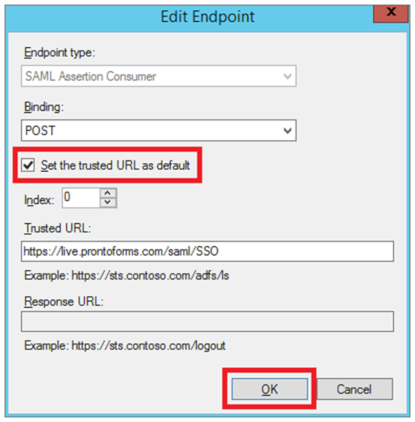
In the Edit Endpoint dialog, select the option to Set the trusted URL as default and select OK to be returned to the Properties dialog.
-
In the Endpoints tab of the Properties dialog, select Add SAML...
-
In the Add an Endpoint dialogue, select the following options:

-
Endpoint Type: SAML Assertion Consumer
-
Binding: Artifact
-
Trusted URL: https://live.prontoforms.com/saml/SSO
-
Select OK to be returned to the Properties dialog.
-
-
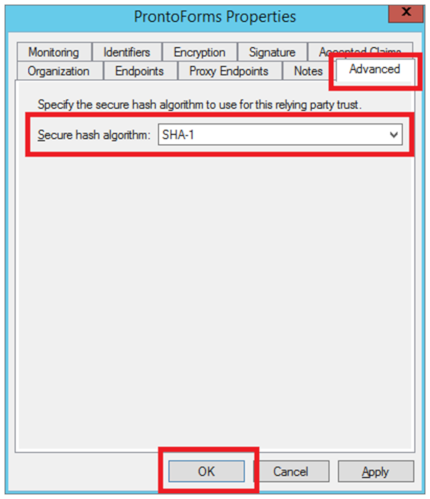
In the Advanced tab, set Secure hash algorithm to SHA-1 and select OK.
- Open Windows PowerShell and execute the following commands:
Get-AdfsRelyingPartyTrust -Identifier prontoforms.com/prod | Set-AdfsRelyingPartyTrust -SigningCertificateRevocationCheck None

Get-AdfsRelyingPartyTrust -Identifier prontoforms.com/prod | Set-AdfsRelyingPartyTrust -EncryptionCertificateRevocationCheck None

Get-AdfsRelyingPartyTrust -Identifier prontoforms.com/prod | Set-AdfsRelyingPartyTrust -SignedSamlRequestsRequired $false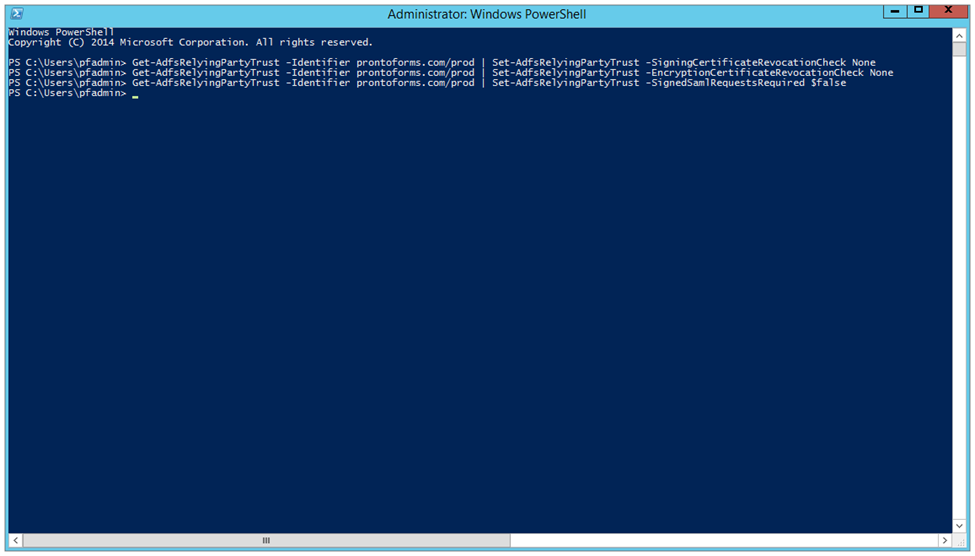
-
Download the ADFS Federation Metadata by entering the URL into a web browser using the following format:
https://<ADFS Server>/federationmetadata/2007-06/federationmetadata.xml
Note: Save this metadata XML to a file. This is the Identity Provider Metadata that you will need later to configure TrueContext for SSO.

- ADFS is now ready to accept SSO connections from TrueContext.
- To configure TrueContext for SAML, please read: Set up corporate login (Single Sign-On)