Set up Microsoft Entra ID for TrueContext Corporate Single Sign-On
Microsoft Entra ID is a cloud-based identity management service that replaces Azure Active Directory. This topic describes how to set up Single Sign-On (SSO) using Microsoft Entra ID.
Available on the Enterprise tier only:
Contents
Process to set up SSO
| Step | System | Description |
|---|---|---|
| 1 | TrueContext Web Portal |
Download the Service Provider Metadata. |
| 2 | Microsoft Entra admin center | Create a TrueContext application and upload the Service Provider metadata from the previous step. |
| 3 | Microsoft Entra admin center | Download the Identity Provider (IdP) metadata for the application that you just created. |
| 4 | TrueContext Web Portal | Enable SSO and upload the IdP metadata. |
Prerequisites
-
You must be a TrueContext Admin user to access the Team Settings
 The Team Settings page is the page where an admin can manage their team's account and edit certain information, such as assigning a Problem Contact Email Address, toggling push notifications, and viewing the account's billing information. in the Web Portal.
 -
Check that you have access to the Microsoft Entra admin center with one of the following roles:
- Cloud Application Administrator
- Application Administrator
- Owner of the service principal
-
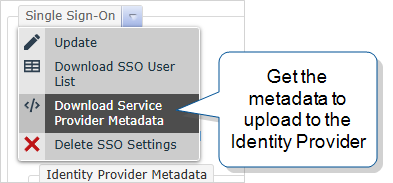
In the TrueContext Web Portal, download the Service Provider Metadata:
Team Settings > Security > Single Sign-On > Download Service Provider Metadata
Detailed steps to set up SSO
-
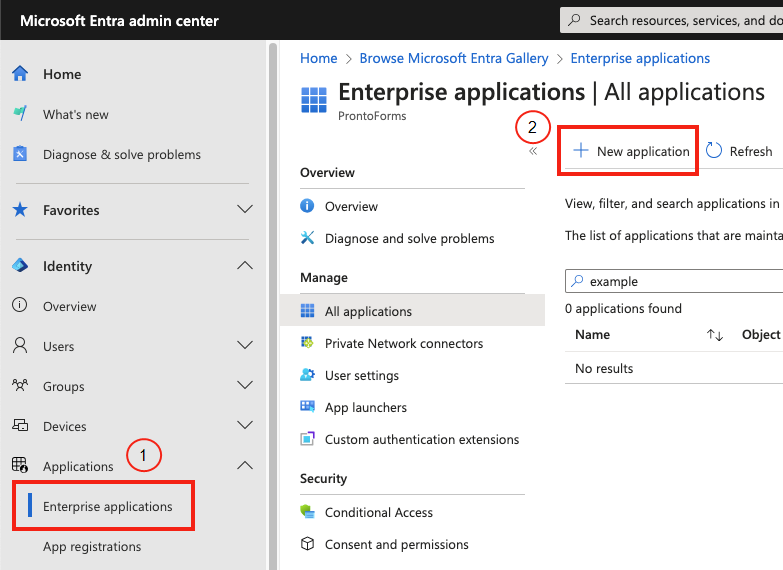
In the Microsoft Entra admin center, create a new TrueContext application. Select Enterprise applications > New application.
-
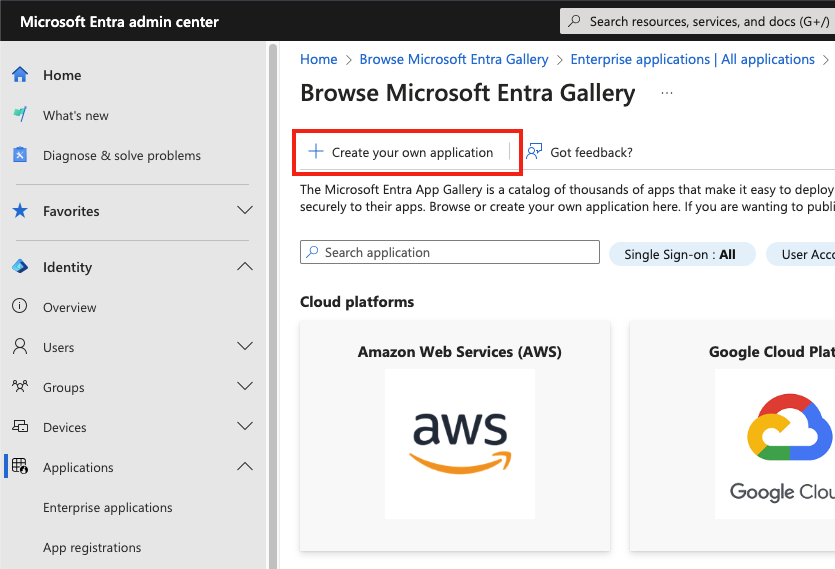
Select Create your own application.
-
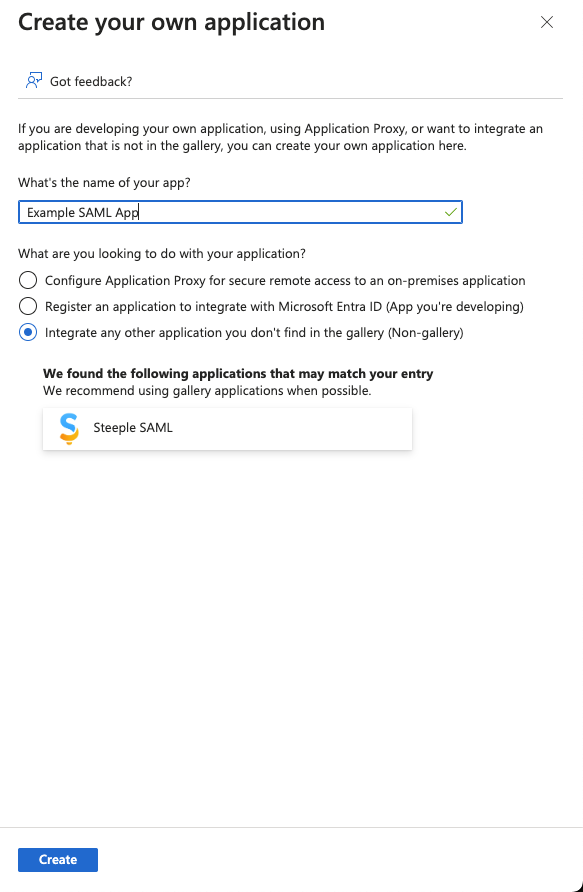
Create a SAML application to integrate with TrueContext. Enter a name for the new application, select the Integrate… option, and then select Create.
-
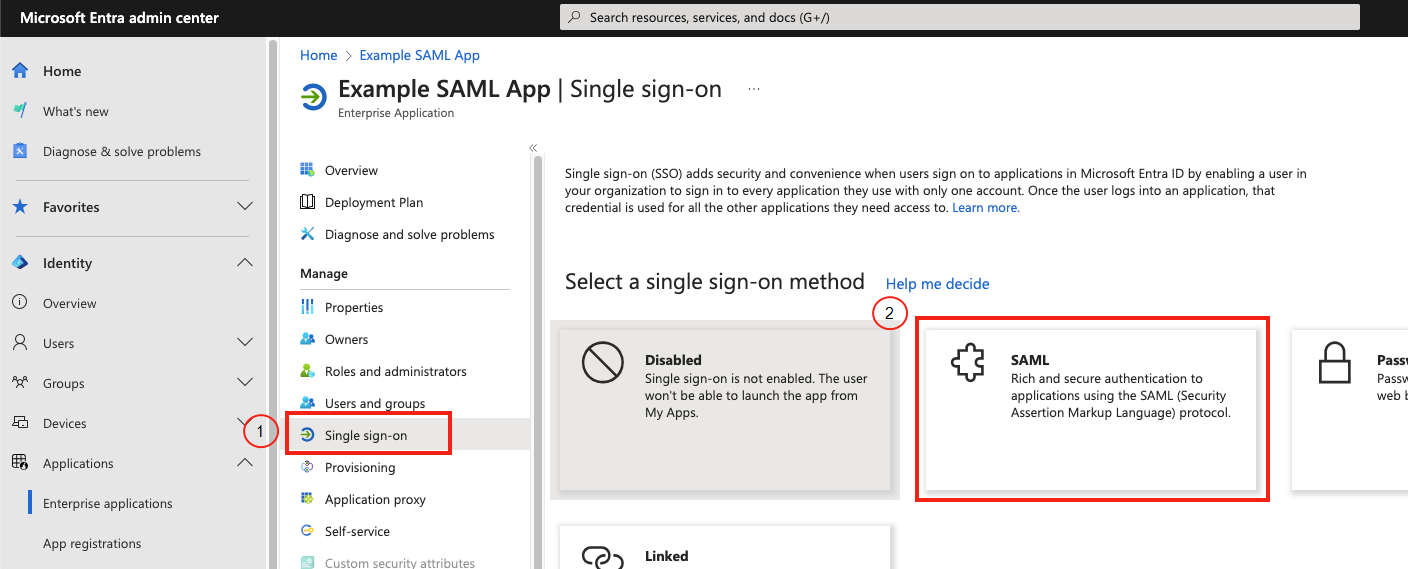
For the new application, select Single sign-on, and then select SAML as the sign-on method.
-
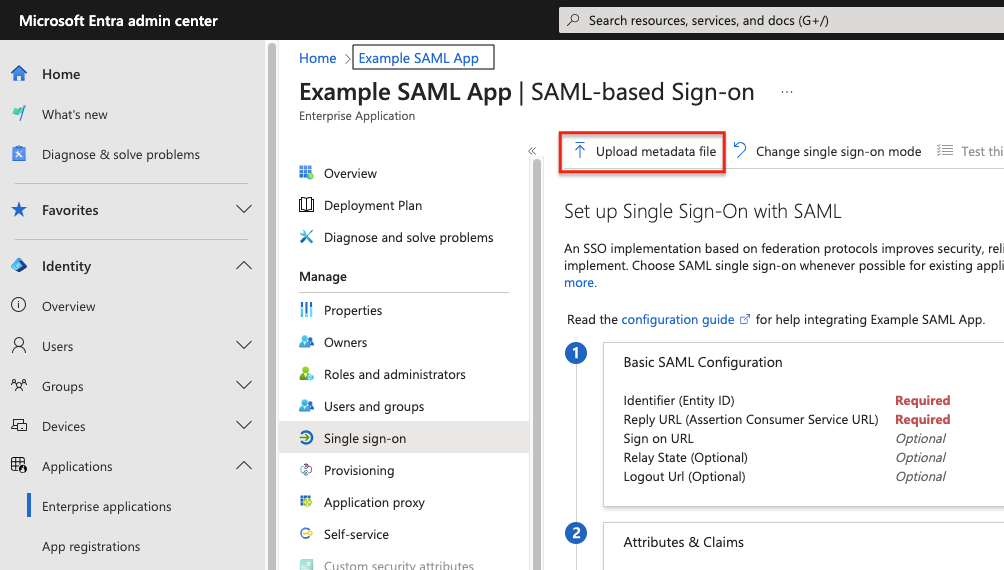
Upload the metadata file from TrueContext that you downloaded in step 3 of the prerequisites.
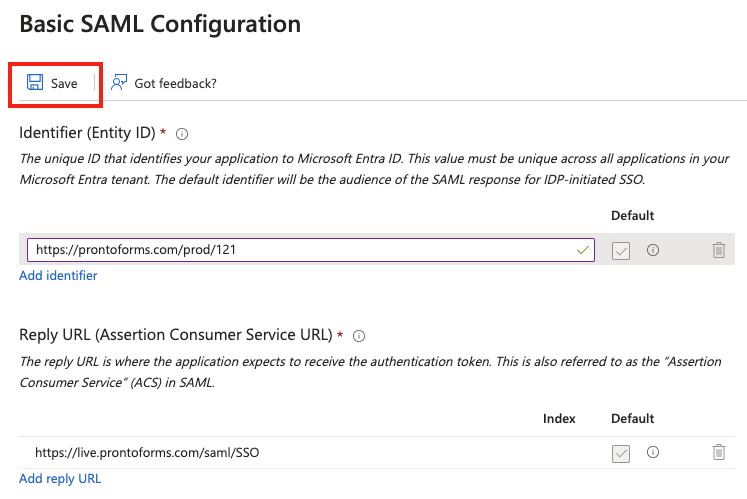
Tip:Instead of uploading the metadata file, you can manually enter the Single sign-on values:- Identifier… prontoforms.com/prod
- Reply URL… https://live.prontoforms.com/saml/SSO
Info:We’re now TrueContext.To support existing integrations, some items will continue to use “prontoforms” or “pf” in the domain or code.
For more detailed information about what’s changing, visit https://support.truecontext.com/hc/en-us/articles/19516168513556
-
Save your setup.
-
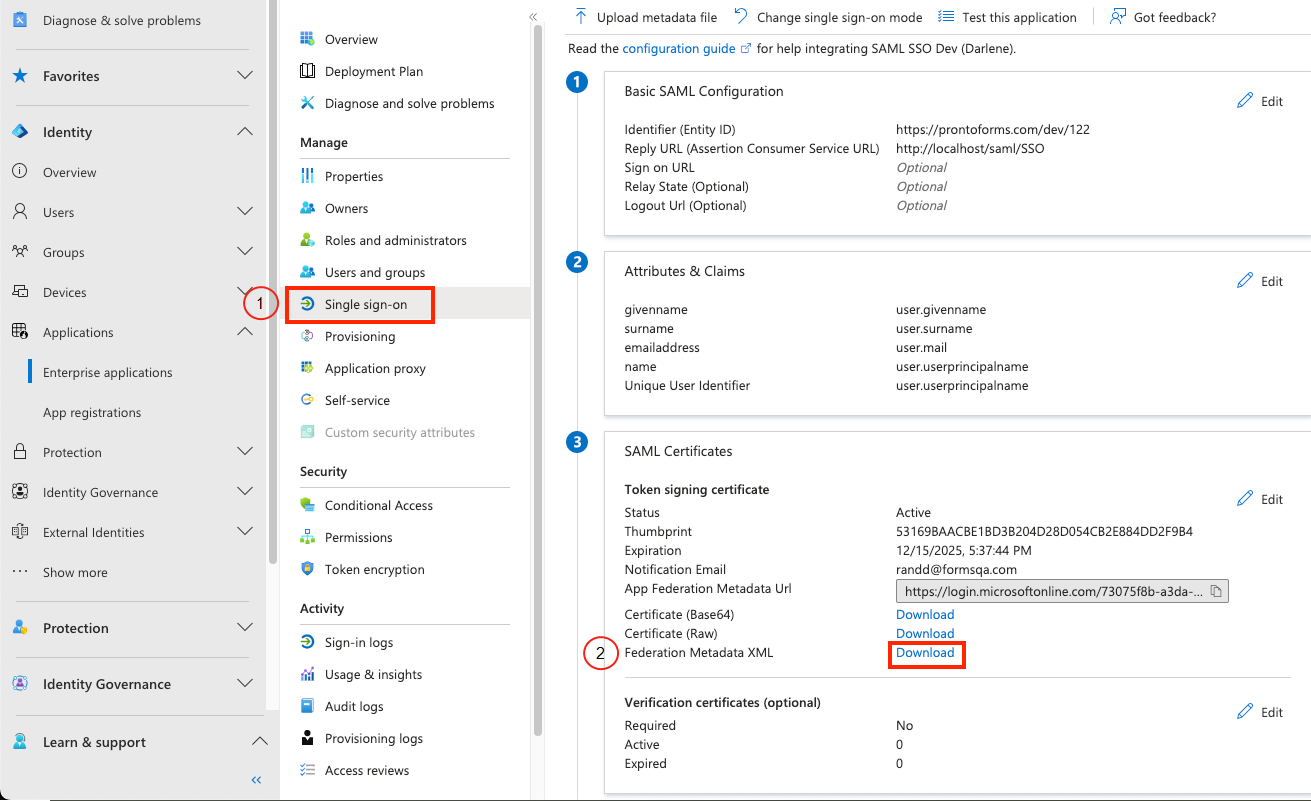
Download the Identity Provider (IdP) metadata for the application that you just created. Go to Single sign-on > Federation Metadata XML > Download.
-
Add users and groups to the application.
Note:Usernames in Microsoft Entra must match the usernames in TrueContext, unless you have User Aliases or Username Suffixes configured in TrueContext.
-
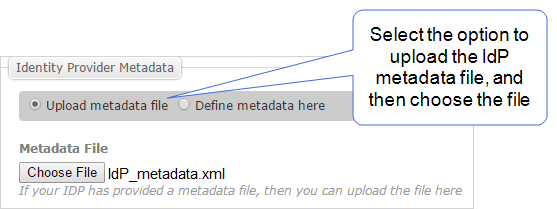
In TrueContext, enable SSO and upload the IdP metadata. Go to Team Settings > Security > Single Sign-On > Update.
Result: The system displays the SSO settings, including the option to upload and choose a metadata file.
Info:The section Set up corporate login (Single Sign-On): Single Sign-On Configuration explains the SSO settings in more detail.
-
Select Update to save your changes.
Result: SSO takes effect the next time your users sign into TrueContext.
