Generate a form with the AI Form Builder
The AI Form Builder creates a draft TrueContext form from a supported document or image file. The draft is a starting point that you must review and configure before deployment. This includes linking any required Data Sources Data sources, also known as "Lookups", are external sources of data that you upload or connect to TrueContext. You can reference this data in a form to populate answers or answer options. Data sources save typing, reduce errors, and make it easy to provide mobile users with only the relevant, most current data. and Data Destinations A Data Destination specifies where to send data from a submitted form. You can use Data Destinations to automate data sharing and storage, routing data to a specific service (such as email or cloud storage) in several different formats..
Available on the Elite tier:
Contents
Prerequisites
- Your TrueContext team is on the Elite tier, and an administrator has enabled AI usage for your team.
- You have Can Create permission in the FormSpace FormSpaces are where forms are stored and organized in the TrueContext Web Portal. A TrueContext Team may have multiple FormSpaces, depending on their needs. Admins can set FormSpace permissions to control which users have access to the forms in that FormSpace..
- You have one source file in a supported format:
- Documents: PDF, CSV, Word (.doc, .docx), Excel (.xls, .xlsx), HTML, plain text (.txt), and Markdown (.md).
- Images: PNG, JPEG/JPG, GIF, and WebP.
Note:The AI Form Builder The Form Builder is the tool that form designers use to create forms. In the Form Builder, accessed from the TrueContext Web Portal, form designers can add and edit pages, sections, and questions, as well as attach data destinations and configure the form's settings. creates mobile app forms. It doesn't
create Customer Feedback forms. To create a Customer Feedback form, go to Overview: Customer Feedback Forms.
Video Overview
Generate a form
-
In the Web Portal, go to the FormSpace where you want the new form, and then open the Forms page.
-
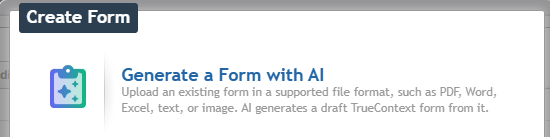
Select Create Form, and then select Generate a Form with AI.
-
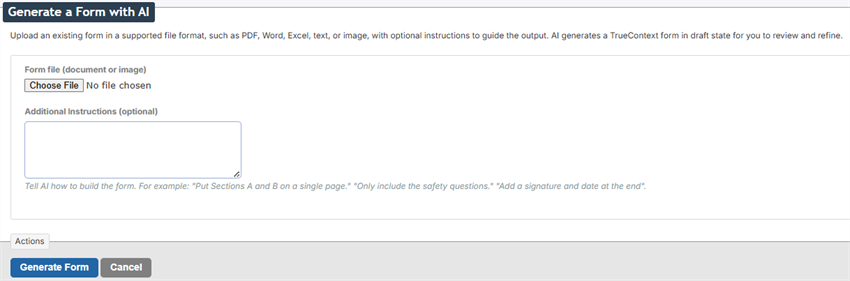
Under Form file, select Choose File, and then select your source file. You upload one file per form.
Tip:To generate a form from several photos, combine them into one file, such as a PDF, and then upload that file.
-
The Additional Instructions field is optional. Use it to tell AI how to interpret or structure the form. Leave it blank to let AI decide from your file alone.
Some examples:
Use it to Example instruction Choose a question type "Use dropdowns instead of button groups" Organize the form "Put Sections A and B on a single page" Limit what is included "Only include the safety questions" Add a field "Add a technician name field and an inspection date at the top" Set the name and tags "Name the form Daily Safety Check and tag it safety and daily" Note:Additional Instructions guide the result; they do not guarantee it. Review the draft to confirm that AI applied your instructions.
-
To start generation, select Generate Form.
AI generates the form in the background. The form diagram page shows progress. You can leave the page and come back while the form generates. After the draft generation finishes, select Edit Form to continue refining the form.
Note:If you do not see the Generate a Form with AI option, AI usage isn't yet enabled for your team.
Note:AI makes up to five attempts to generate a valid form. If AI generates a form but the form doesn't pass validation, the AI Form Builder saves the best available draft for review. If AI form generation is unsuccessful, no draft is saved.
Review the generated draft form
Review each of these elements of the AI generated draft against your uploaded file:
-
Form name, description, and up to three tags
-
Questions and their data types
-
Conditional Logic, additional-comment fields, and required questions
Note:For these elements, AI adds what it can infer from the uploaded file.
Apply the refinement process
Treat the generated draft as a starting point. Review it against your source file, then apply or adjust the relevant parts of the refinement process:
-
Form language
-
Answer exceptions, default answers, numeric minimum and maximum values, and validation formulas
-
Conditional Logic, additional-comment fields, and required questions
Note:Add anything that AI did not infer from the uploaded file.
-
Data Sources, Data Destinations, Output Documents
-
Other form settings, such as the dispatch method, permissions, geolocation
Geo Location refers to the capture of location data in a form. A Geo Location question can act as a selector, where the user selects a location on a map, or as a stamp, which automatically captures the device's current location when a form page opens. Location data is classified as Fine (GPS) or Coarse (Network), depending on the accuracy of the source. stamping, and index and summary pages
When the form is ready, test it and deploy it through your standard deployment flow.
Generate another draft
The AI Form Builder doesn't edit or refine an existing draft. To get a different result, generate a new draft.
-
To generate a new draft, upload an updated file and optionally add Additional Instructions.
-
Each attempt creates a new draft with a similar name and keeps the one you reviewed, so rename or delete the drafts you don't need.