Set Up a Form for Dispatching
Available on all tiers with more options on the Intelligent and Elite tiers:
Contents
About
In order to dispatch a form to users, it must be set up to allow dispatching. Follow the steps below to enable dispatching for a form.
Set Up a Form for Dispatching
-
Hover over Forms & Integrations, and then select List Forms.
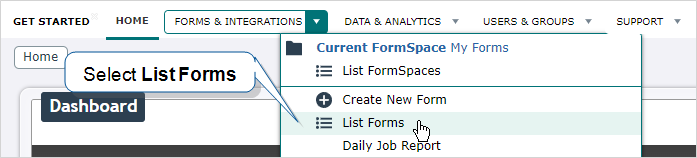
Result: The system displays a list of all available forms.
-
From the list, select the desired form.
-
Select Edit Form.

Result: The system displays the selected form in the Form Builder.
-
Under Settings > Workflow Settings > Form Initiation Methods, select one of two options:

-
Inbox (Dispatched Forms): If selected, users can only receive the form in their Inbox via dispatches.
-
Inbox and Forms Box: (Default) If selected, users can open the form from both their Inbox (if dispatched) and Forms list.
-
Allow mobile users to decline forms dispatched to them: (Optional) If selected, mobile users can decline to fill out forms dispatched to their Inbox.
Info:The topic Set Up Form Properties describes all three Form Initiation Methods in more detail.Note:When you use a Dispatch Data Destination
-
-
Select Save and Deploy.