Create and Manage Prompts to Use in Forms
Prompts tell the AI how to enhance text that mobile users enter on device. As a form designer, you upload context files that give the AI background information, then write prompts that reference them. After you save a prompt, it's available to add to any Text Area question in the same FormSpace![]() FormSpaces are where forms are stored and organized in the TrueContext Web Portal. A TrueContext Team may have multiple FormSpaces, depending on their needs. Admins can set FormSpace permissions to control which users have access to the forms in that FormSpace..
FormSpaces are where forms are stored and organized in the TrueContext Web Portal. A TrueContext Team may have multiple FormSpaces, depending on their needs. Admins can set FormSpace permissions to control which users have access to the forms in that FormSpace..
Available on the Elite tier:
Contents
Video demo
Prerequisites
-
You must be an Admin user or a User with Can Create FormSpace permissions.
-
An Admin user must have approved AI usage for your team. For details, go to Approve AI Usage for Your Team.
Manage context files
Context files give the AI background information when enhancing text. Examples of context files include product manuals, style guides, and terminology standards. A single uploaded file works across multiple prompts in the same FormSpace.
Upload a context file
-
Prepare your context file. The file must:
-
Be a Markdown (
.md) or plain text (.txt) file. -
Be 100 KB or smaller.
-
-
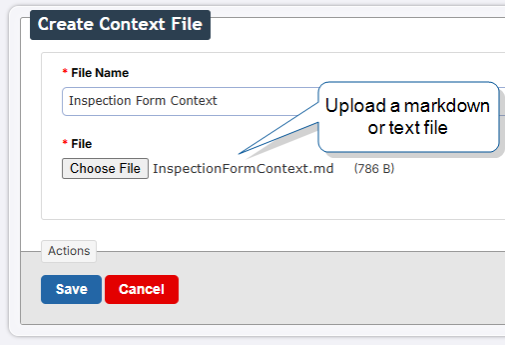
In the Web Portal, go to Forms & Integrations > Context Files, and select create context file.
Result: The Create Context File page opens.
-
Enter a File Name. This is the unique name for the file in the Web Portal.
Note:If you enter a File Name that already exists in the FormSpace, the new upload replaces the existing file.
-
Select Choose File and pick a file from your computer.
-
Select Save.
Result: The portal validates the file. If the format or size isn't supported, an error appears. If the file is valid, the file's detail page opens and the file appears in the Context Files list.
Note:You can’t edit context file contents in the Web Portal. To update the contents, download the file, edit it locally, and upload the new version.
Download a context file to edit it
-
In the Web Portal, go to Forms & Integrations > Context Files.
-
Select the file name to open its detail page.
-
In the Content section, select Download this file.
Result: The system downloads the original uploaded file to your computer.
Edit a context file
Use Edit Context File to rename the file or upload a replacement. To change the file's contents, download the file, edit it on your computer, then upload the new version.
-
Open the detail page for the file.
-
Select edit context file.
Result: The Edit Context File page opens with the current File Name pre-filled.
-
Edit the File Name if needed.
-
Select Choose File and pick a new file from your computer.
-
Select Save.
Result: The new file replaces the original. All prompts that reference this file now use the new contents.
Delete a context file
Note:If any prompt references a context file, the Delete option in the file's menu isn't available. The detail page's Referencing Prompts panel shows which prompts reference the file. To delete a referenced context file, first remove the file from every referencing prompt.
-
Open the detail page for the file.
-
Next to the file name, open the menu and select Delete.
Result: The system removes the file from the FormSpace.
Manage prompts
Prompts contain the AI instructions that mobile users apply when they enhance their text on device. Each prompt has a unique name, written instructions, and optional references to context files. Form designers attach prompts to Text Area questions in the Form Builder![]() The Form Builder is the tool that form designers use to create forms. In the Form Builder, accessed from the TrueContext Web Portal, form designers can add and edit pages, sections, and questions, as well as attach data destinations and configure the form's settings. to enable AI Text Transformation
The Form Builder is the tool that form designers use to create forms. In the Form Builder, accessed from the TrueContext Web Portal, form designers can add and edit pages, sections, and questions, as well as attach data destinations and configure the form's settings. to enable AI Text Transformation![]() AI Text Transformation uses AI prompts to refine a mobile user's text in a Text Area question. Mobile users select a prompt, review the AI output, and approve the result before it's saved with the form submission. AI Text Transformation appears as AI Enhancement in the Form Builder. On the mobile app, it appears as a sparkle icon on the formatting toolbar..
AI Text Transformation uses AI prompts to refine a mobile user's text in a Text Area question. Mobile users select a prompt, review the AI output, and approve the result before it's saved with the form submission. AI Text Transformation appears as AI Enhancement in the Form Builder. On the mobile app, it appears as a sparkle icon on the formatting toolbar..
Create a prompt
Note:Make sure to Upload a context file you plan to reference before you create your prompt.
-
In the Web Portal, go to Forms & Integrations > Prompts, and select create prompt.
Result: The Create Prompt page opens.
-
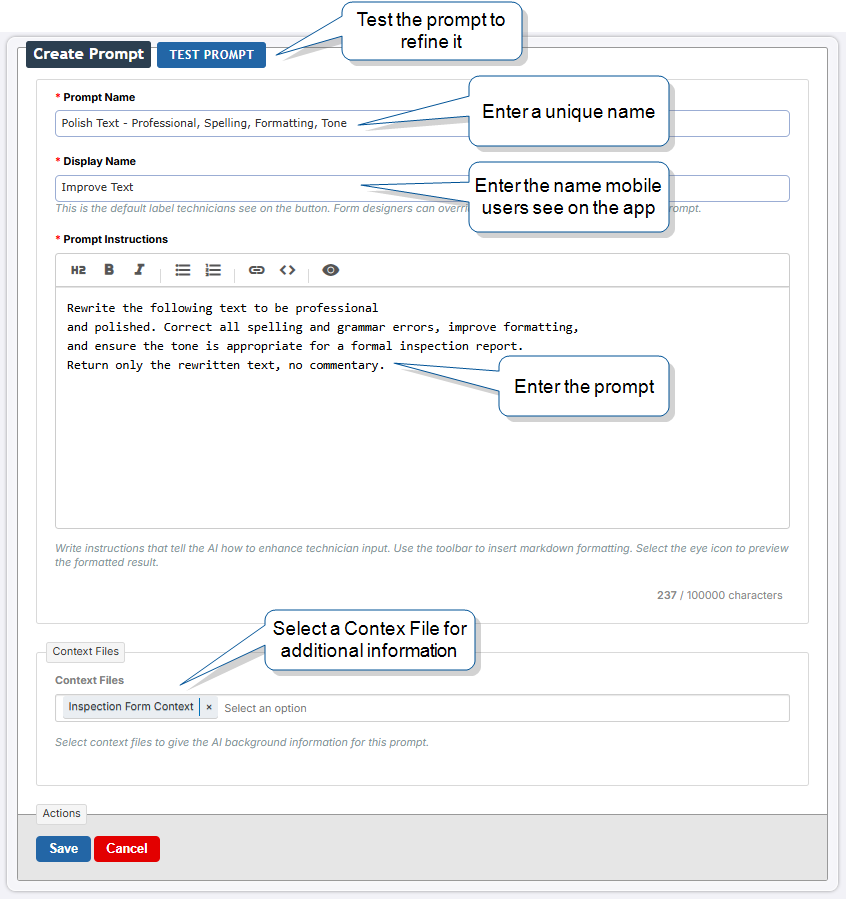
Enter a Prompt Name. This is the internal identifier for the prompt in the Form Builder. Prompt
 A prompt contains the AI instructions that mobile users apply to enhance their text on device. Form designers write prompts in the Web Portal and attach them to Text Area questions to enable AI Text Transformation. Names must be unique within the FormSpace.
 -
Enter a Display Name of up to 50 characters. This is the default label that mobile users see for this prompt on their device, for example "Improve Text".
Note:When a form designer attaches this prompt to a Text Area in the Form Builder, they can choose to keep the default or override it. Two prompts can share the same Display Name.
-
Write instructions for the AI in the Prompt Instructions field.
Note:-
The field accepts up to 100,000 characters and shows the markdown source as you write. A character counter below the editor shows how much of the limit you've used. The eye icon in the toolbar previews the rendered formatting.
-
You can attach a prompt to any Text Area question in the FormSpace. If you plan to attach the prompt to a question that doesn't have Rich Text formatting
Rich Text formatting makes a Text Area question support rich text. Mobile users see a formatting toolbar on device, and the question renders markdown content as styled text. Available on Text Area questions and on Additional Comments that use a Text Area. on, instruct the AI to return plain text. Otherwise, mobile users see raw markdown syntax in the answer. For more, go to How Rich Text formatting and AI Text Transformation work together.
-
-
To attach context files, go to the Context Files section and select up to five files from the dropdown.
Note:The Context Files section appears only when at least one context file exists in the FormSpace.
-
Test the prompt with example input before saving. For the steps, go to Test a prompt.
-
Select Create.
Result: The prompt's detail page opens. The new prompt also appears in the Prompts list.
From a prompt's detail page, you can edit, test, copy, or delete the prompt. The detail page also lists the context files the prompt references and the forms that reference the prompt.
Test a prompt
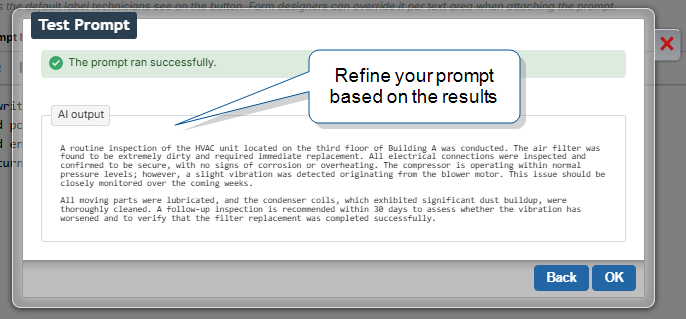
Test a prompt by running example input through it. The test panel returns the AI output. Use the output to refine the prompt instructions before saving.
-
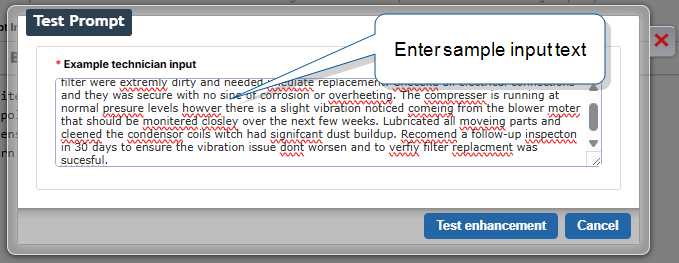
From the prompt editor or the prompt's detail page, select test prompt.
Result: The test panel opens.
-
Enter example input in the Example technician input field.
-
Select Test enhancement.
Result: The AI output appears in the AI output field.
-
To test the prompt with new input, select Back and enter new input.
Tip:To see how changes to your prompt instructions affect the AI output, select Close, edit the prompt instructions, and start a new test.
Copy a prompt
Copy an existing prompt to use it as a starting point for a new one. You can copy to the current FormSpace or to a different FormSpace.
-
In the Web Portal, go to the Prompts page.
-
In the prompt's row, select Copy in the Actions column.
Result: The Copy Prompt page opens. Target FormSpace pre-fills with the current FormSpace. Target Prompt Name pre-fills with the source prompt's name.
-
To copy to a different FormSpace, select another FormSpace from the Target FormSpace dropdown.
-
Edit the Target Prompt Name if needed. Prompt Names must be unique within the target FormSpace.
-
If a Context File Conflict Strategy section appears, choose how to handle context files in the target FormSpace that share a name with files the source prompt references:
-
Overwrite replaces the target FormSpace's matching context file with the source version.
-
Repoint references the existing context file in the target FormSpace. This is the default.
-
Rename creates a new context file with a unique name in the target FormSpace.
-
-
Select Copy.
Result: The new prompt appears in the target FormSpace Prompts list.
Delete a prompt
Delete a prompt you no longer need from the FormSpace.
Warning:You can't delete a prompt that any form versions reference. To delete a referenced prompt, first delete every referencing form version. Deleting a form version permanently deletes all submissions made against that version.
-
In the Web Portal, go to the Prompts page.
-
In the prompt's row, select Delete in the Actions column.
Result: If no form versions reference the prompt, the Delete Prompt confirmation dialog opens. If a form version references the prompt, the Web Portal shows the referencing forms, and the prompt isn't deleted.
-
To confirm the deletion, select Permanently Delete Prompt.
Result: The system removes the prompt from the FormSpace.