Move and Copy Forms
Move or copy a form to make it available in a different FormSpace![]() FormSpaces are where forms are stored and organized in the TrueContext Web Portal. A TrueContext Team may have multiple FormSpaces, depending on their needs. Admins can set FormSpace permissions to control which users have access to the forms in that FormSpace.. Move a form when you want it to exist in only one location after the transfer. Copy a form when you want to keep the original and create a duplicate, either as a new form or as a new version of an existing form. Both actions also transfer connected resources
FormSpaces are where forms are stored and organized in the TrueContext Web Portal. A TrueContext Team may have multiple FormSpaces, depending on their needs. Admins can set FormSpace permissions to control which users have access to the forms in that FormSpace.. Move a form when you want it to exist in only one location after the transfer. Copy a form when you want to keep the original and create a duplicate, either as a new form or as a new version of an existing form. Both actions also transfer connected resources![]() Resources are materials that field technicians can access while they work on records in the Mobile App. A resource might be a Resource Document, like a manual or a floor plan, or a Resource Image, like a schematic or a diagram. Resources are uploaded to a FormSpace and can be referenced in forms or made available in the Resource Library. such as Data Sources
Resources are materials that field technicians can access while they work on records in the Mobile App. A resource might be a Resource Document, like a manual or a floor plan, or a Resource Image, like a schematic or a diagram. Resources are uploaded to a FormSpace and can be referenced in forms or made available in the Resource Library. such as Data Sources![]() Data sources, also known as "Lookups", are external sources of data that you upload or connect to TrueContext. You can reference this data in a form to populate answers or answer options. Data sources save typing, reduce errors, and make it easy to provide mobile users with only the relevant, most current data., Documents, Resource Images
Data sources, also known as "Lookups", are external sources of data that you upload or connect to TrueContext. You can reference this data in a form to populate answers or answer options. Data sources save typing, reduce errors, and make it easy to provide mobile users with only the relevant, most current data., Documents, Resource Images![]() A Resource Image is an image file, such as an equipment schematic or diagram, that helps field technicians complete their work. Form designers upload Resource Images (JPG, JPEG, or PNG) to a FormSpace and can reference them in forms or make them available in the Resource Library. When a Resource Image is updated, forms automatically use the latest version after the device reconciles.
A Resource Image is an image file, such as an equipment schematic or diagram, that helps field technicians complete their work. Form designers upload Resource Images (JPG, JPEG, or PNG) to a FormSpace and can reference them in forms or make them available in the Resource Library. When a Resource Image is updated, forms automatically use the latest version after the device reconciles.
Available on all tiers:
Contents
Prerequisites
- At least one additional FormSpace must exist as a destination.
- You must be an Admin user or a User with Can Create permissions in both the source and target FormSpaces.
Info:Go to Managing FormSpaces for information about creating and managing FormSpaces.
Move a form
When you move a form, the form is removed from the source FormSpace and placed in the target FormSpace.
-
From Forms & Integrations, go to the form you want to move.
-
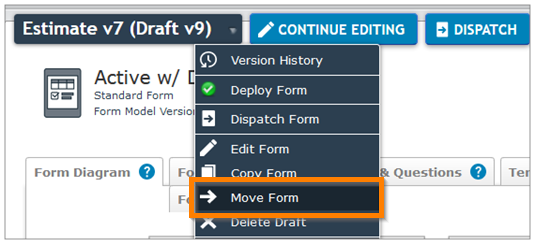
Hover over the dropdown beside the form name.
-
Select Move Form.
-
Select the Target FormSpace. This is the FormSpace the form moves to.
-
Link the form to Data Destinations in the target FormSpace. Data Destinations
 A Data Destination specifies where to send data from a submitted form. You can use Data Destinations to automate data sharing and storage, routing data to a specific service (such as email or cloud storage) in several different formats. set to auto-link attach automatically.
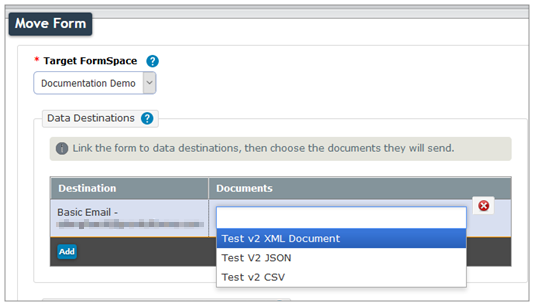
-
In the Documents column, choose the Documents to send for each Data Destination
A Data Destination specifies where to send data from a submitted form. You can use Data Destinations to automate data sharing and storage, routing data to a specific service (such as email or cloud storage) in several different formats.. You can only choose Documents already linked to the form. This includes Documents linked directly in the form settings (Settings > Documents) and Documents sent by linked Data Destinations.Tip:Some Data Destinations do not support Documents, and some can send multiple Documents.
Note:After you move a form to a new FormSpace, Documents in the target FormSpace become available to link to the form. Documents in the source FormSpace are no longer available.
Info:When you attach a Multi-Language Document
A Multi-Language Document is an output Document connected to a Multi-Language Form. You can generate the Document in any of the languages configured in the form. The Document uses the form's translation files to translate headings, question text, and other content. to a Data Destination, you can select languages for the document files. The topic Steps to attach a Multi-Language Document to a Data Destination describes the language options in more detail. -
Select additional Documents. These Documents are available for download from the Web Portal, in the Sent tab of the Mobile App, and through the TrueContext API. You can only choose Documents already linked to the form. Documents linked in the form settings are selected by default.
-
Set the Advanced Properties. Go to the Advanced Properties section for details.
Result: The form is moved to the target FormSpace.
Copy a form
When you copy a form, the original remains in the source FormSpace and a duplicate is placed in the target FormSpace. You can copy a form as a new form or as a new version of an existing form.
-
From Forms & Integrations, go to the form you want to copy.
-
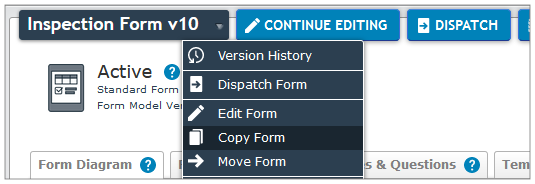
Hover over the dropdown beside the form name.
-
Select Copy Form.
-
Select the Target FormSpace. This is the FormSpace the copy is placed in.
-
In the Target Form section, choose whether to create a new form or update an existing form:
Option Result Actions Create Form The system creates a copy of the form as a new form. Create as New Version of an Existing Form The system copies the form and saves it as a new version of an existing form. 
-
Choose how you want the system to link Data Destinations and Documents to the new form version:
Option Description Action Keep the target form Data Destinations and Documents Add the same Data Destinations and Documents that are already linked to the target form. Go to step 10. Change and select Data Destinations and Documents Select the Data Destinations and Documents that you want to add to the new form version. Go to step 7. -
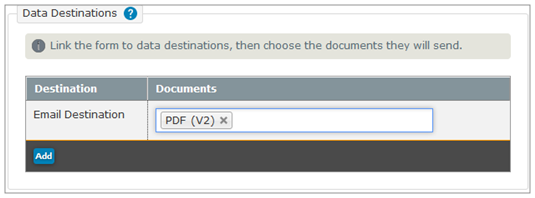
Link the copy to Data Destinations in the target FormSpace. Data Destinations set to auto-link attach automatically.
-
In the Documents column, choose the Documents to send for each Data Destination. You can only choose Documents already linked to the form. This includes Documents linked directly in the form settings (Settings > Documents) and Documents sent by linked Data Destinations.
Tip:Some Data Destinations do not support Documents, and some can send multiple Documents.
Note:After you copy a form to a new FormSpace, Documents in the target FormSpace become available to link to the form. Documents in the source FormSpace are no longer available.
Info:When you attach a Multi-Language Document to a Data Destination, you can select languages for the document files. The topic Steps to attach a Multi-Language Document to a Data Destination describes the language options in more detail.
-
Select additional Documents. These Documents are available for download from the Web Portal, in the Sent tab of the Mobile App, and through the TrueContext API. You can only choose Documents already linked to the form. Documents linked in the form settings are selected by default.
-
Set the Advanced Properties. Go to the Advanced Properties section for details.
-
Select Copy to save your changes.
Result: A copy of the form is placed in the target FormSpace.
Advanced Properties
Advanced Properties control how the system handles connected resources when you move or copy a form. When a form transfers between FormSpaces, it brings a copy of any connected resources (Data Sources, Documents, Resource Images
If a form references prompts that use context files, the context files transfer with the prompts.
Action to perform on duplicate Data Sources, Documents, Resources, and Prompts in target FormSpace
-
Overwrite the duplicates: Copies resources linked to the form into the target FormSpace and replaces target FormSpace resources that have the same name.
Warning:This option affects all forms using these resources, not only the form being moved or copied.
-
Link the target form to the existing duplicates: If resources in the target FormSpace have the same name as resources linked to the form, the form uses those resources instead. No copy is made.
Tip:This option is selected by default.
-
Copy and rename the duplicates: Copies resources linked to the form into the target FormSpace. If these resources have the same name as existing resources in the target FormSpace, the system renames them to avoid duplication.
