Managing FormSpaces
Available on all tiers:
Contents
About
Forms are organized in folders called "FormSpaces". Forms are usually grouped into FormSpaces based on business unit, location, or function. In cases where all users can have access to all forms, sometimes one FormSpace![]() FormSpaces are where forms are stored and organized in the TrueContext Web Portal. A TrueContext Team may have multiple FormSpaces, depending on their needs. Admins can set FormSpace permissions to control which users have access to the forms in that FormSpace. is enough.
FormSpaces are where forms are stored and organized in the TrueContext Web Portal. A TrueContext Team may have multiple FormSpaces, depending on their needs. Admins can set FormSpace permissions to control which users have access to the forms in that FormSpace. is enough.
FormSpaces control:
- Which TrueContext users get which forms (FormSpace Permissions)
- Which users can test a draft version of a form before deploying it
- Which users can create or update forms or view users' completed forms (User Permissions)
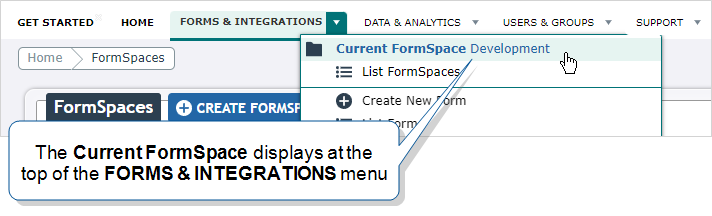
Current FormSpace
FormSpaces contain forms, data sources![]() Data sources, also known as "Lookups", are external sources of data that you upload or connect to TrueContext. You can reference this data in a form to populate answers or answer options. Data sources save typing, reduce errors, and make it easy to provide mobile users with only the relevant, most current data., data destinations, and more. When you are looking at any of these objects, you are working inside a specific FormSpace. This is your Current FormSpace.
Data sources, also known as "Lookups", are external sources of data that you upload or connect to TrueContext. You can reference this data in a form to populate answers or answer options. Data sources save typing, reduce errors, and make it easy to provide mobile users with only the relevant, most current data., data destinations, and more. When you are looking at any of these objects, you are working inside a specific FormSpace. This is your Current FormSpace.
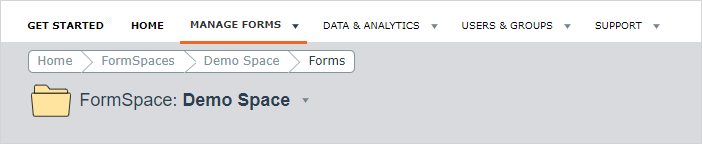
To determine your current FormSpace:
-
Check the Forms & Integrations top navigation item. The Current FormSpace is the first line.
-
Or, if you are working on a page that is inside of a FormSpace, look for the folder icon below the top navigation. The Current FormSpace is also listed here.
Navigating Within a FormSpace
Inside of your current FormSpace, navigate through all the items the FormSpace contains using the large icons on the top right.

- Forms will list the Forms in your current FormSpace.
- Resources will list the Resources
 Resources are materials that field technicians can access while they work on records in the Mobile App. A resource might be a Resource Document, like a manual or a floor plan, or a Resource Image, like a schematic or a diagram. Resources are uploaded to a FormSpace and can be referenced in forms or made available in the Resource Library. in your current FormSpace.
 - Sources will list the Data Sources in your current FormSpace.
- Documents will list the Documents in your current FormSpace.
- Destinations will list the Data Destinations A Data Destination specifies where to send data from a submitted form. You can use Data Destinations to automate data sharing and storage, routing data to a specific service (such as email or cloud storage) in several different formats. in your current FormSpace.
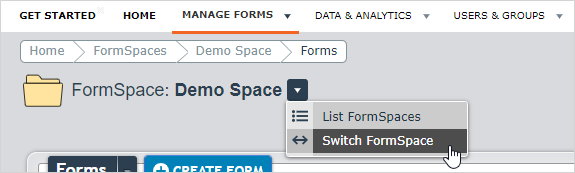
Switch FormSpaces
Switching FormSpaces will allow you to work inside a different FormSpace.
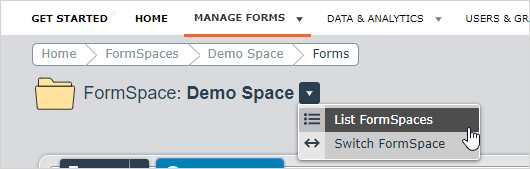
To switch which FormSpace you are working in, mouse over the arrow beside the FormSpace name, and select Switch FormSpace.
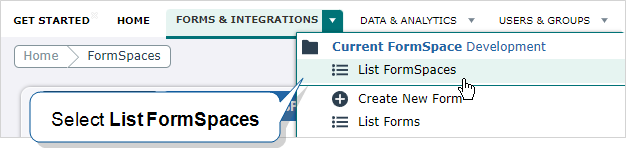
List FormSpaces
To list all FormSpaces on a team:
-
Hover over Forms & Integrations in the main menu and select List FormSpaces.
-
Or, hover over the arrow beside your current FormSpace, and select List FormSpaces.
-
You will land on the FormSpaces list.
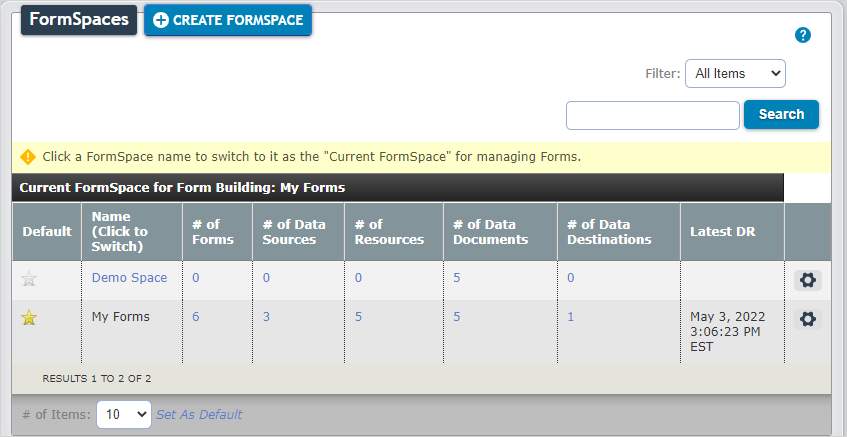
On the FormSpaces List:
- FormSpaces are listed in alphabetical order. You can add a number or symbol to the beginning of the name to make it appear at the top of the list.
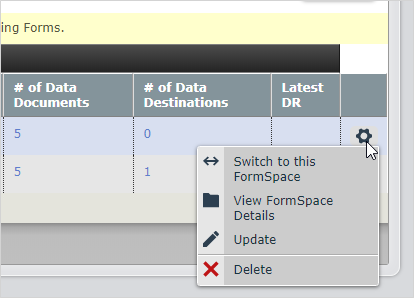
- The number of forms, data sources, resources, and data destinations each FormSpace contains is listed.
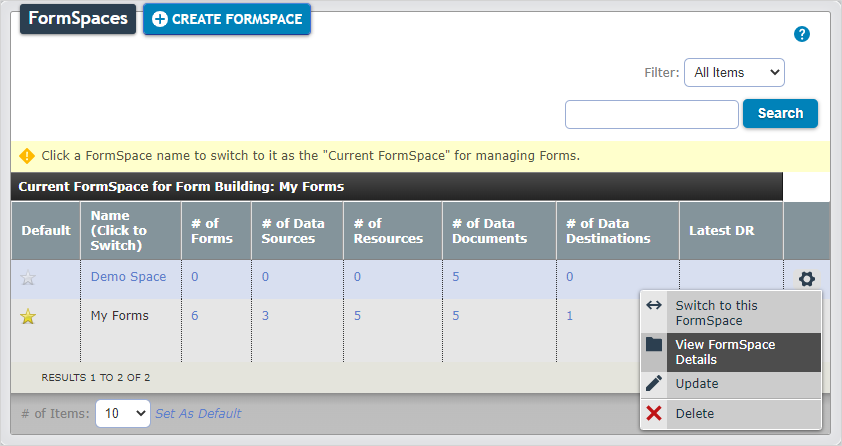
- Hover over the gear icon for quick access to options to view FormSpace details, edit a FormSpace, or delete it.
Note:Deleting a FormSpace will delete everything it contains, including forms, Data Sources, and Data Destinations.
Default FormSpace
The Default FormSpace is automatically the "current" FormSpace when users log in to the Web Portal. For teams with more than one FormSpace, the most-edited FormSpace can be set as the Default FormSpace for ease of navigation.
On the FormSpaces page, the Default FormSpace is indicated with a yellow star. Simply select the star beside the desired FormSpace to make it the default FormSpace. There can only be one default FormSpace per team.
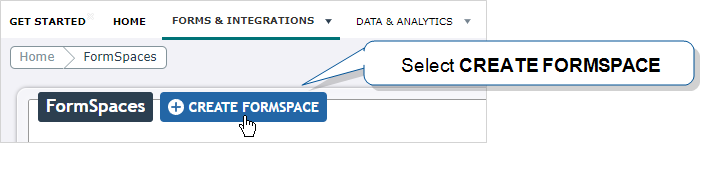
Create a FormSpace
-
From the FormSpaces page, select Create FormSpace.
-
Name the FormSpace.
-
Optionally Notify users of updates to this FormSpace via Push messages. Users will receive a Push Notification through the mobile app when changes have been made. They will be prompted to refresh/reconcile the app to retrieve new data from TrueContext. This will help prevent users from submitting data against out-of-date forms.
Note:Users must also have their mobile app set up to receive push notifications.
-
Upload New Logo: If a logo is uploaded in the FormSpace, it will override the Team-level logo for all forms in the FormSpace. This logo will show on all PDF, Word, and HTML documents for forms in the FormSpace. The recommended size for the banner logo is 1200x400px, and supported file types include PNG (recommended) and JPG.
-
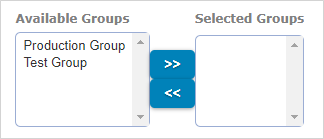
Assign groups to the FormSpace. Users in these groups can use the forms in this FormSpace. A FormSpace can be assigned to multiple groups, and a group can be assigned multiple FormSpaces.
-
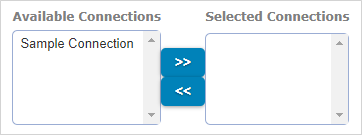
Assign Connections to the FormSpace. Connections are required to link Data Destinations and Data Sources to external services.

Edit or Delete a FormSpace
To edit or delete a FormSpace:
- Navigate to the FormSpaces page.
- Hover over the gear icon on the right of the desired FormSpace and select Update or Delete as desired.
Note:Once a FormSpace is deleted, it cannot be recovered. Deleting a FormSpace will also permanently delete all forms, Data Sources, Data Destinations, and Resources contained in the FormSpace, and all form submissions.