Dispatch Forms to a User
![]() The term "dispatch" refers to the act of sending a form to a mobile user or customer. Typically, a dispatched record includes some information pre-filled to give the recipient context for the work to be done. Dispatch can be manual or automated (using a Dispatch Data Destination or the TrueContext REST API). a form when you want to send work to specific users.
The term "dispatch" refers to the act of sending a form to a mobile user or customer. Typically, a dispatched record includes some information pre-filled to give the recipient context for the work to be done. Dispatch can be manual or automated (using a Dispatch Data Destination or the TrueContext REST API). a form when you want to send work to specific users.
Available on all tiers with more options on the Intelligent and Elite tiers:
Info:
Contents
Overview
Benefits of dispatching
In many cases, starting with a blank form just doesn’t make sense. You know in advance who should be filling out the form, and you know some of the data that belongs there. Dispatching allows an administrator to choose which mobile user should fill out a form and to provide important information about the task.
For example, you can direct a technician to a customer location and provide instructions about the work to be done. This can help mobile workers arrive prepared for their site visit so that they can get right to the task at hand.
Ways to dispatch a form
There are four ways to dispatch forms to users:
- Dispatch from the web portal
- Bulk dispatch from the web portal with a CSV file
- Dispatch with the TrueContext API
- Dispatch data from one form to another with the Dispatch Data Destination
This topic describes the first two options.
Info:The topic Supported Question and Data Types for Dispatching lists the data and question types that each dispatch method supports. It also describes the formatting requirements for specific types of questions, such as Barcode Scanner and Geolocation.
Video demo
Dispatch a form with the Web Portal
We make it quick and easy to dispatch forms to users with the user-friendly dispatch interface.
Prerequisites
-
For a Bulk Dispatch, set up meaningful unique IDs. This helps you to find the questions that you want to prefill with data.
-
Optionally, set the Data Record Naming property of your form to control the form name in the Inbox on the Mobile App.
-
Make sure that your field users are running the latest version of the TrueContext Mobile App.
-
You must be an Admin user or a User with Can Create or Can Manage Assignments group FormSpace permissions.
Steps to dispatch a form
-
Navigate to the desired form, and then select Dispatch beside the form name.

Note:If you don’t see the Dispatch option, make sure the form is set up for dispatching.
Tip:If your group has the Can Manage Assignments permission but not Can Create, users can’t open a specific form definition A Form Definition is a template for an actual form or record that field users interact with. Using the Form Builder, you define the structure, layout, fields and data types, and logic of a form. A Form Definition also specifies resources available to users on their devices, such as Images and Documents, and mappings for data brought in from external sources.. Instead, they should follow these steps to dispatch a record:
Go to Forms & Integrations > List Forms.
Find the form that you want to dispatch, hover over the gear icon, and then select Dispatch Form.
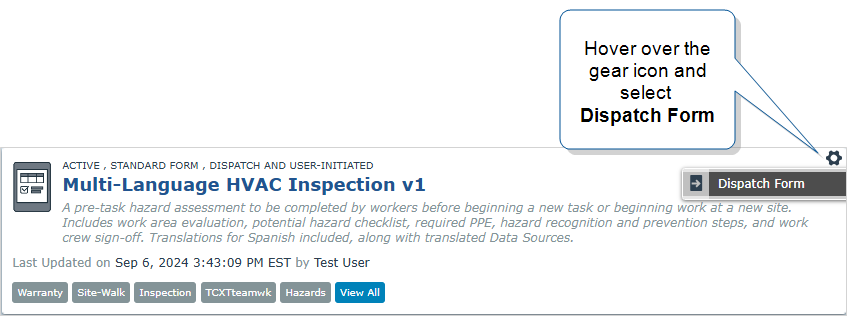
Result: The Dispatch Form page opens.
-
Select a user to dispatch to.
Info:
-
Fill out any fields you want prefilled. Leave all other fields blank.
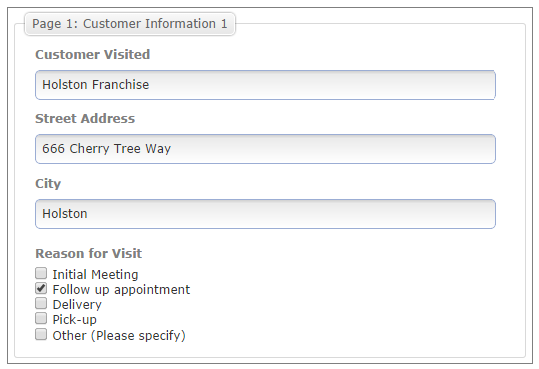
Note:To view all questions, including those that don't support dispatching, select Show questions that cannot be dispatched to.
-
At the bottom of the page, select Dispatch.
Metadata that you can dispatch
Easily assign![]() Assigning and reassigning control which users are responsible for dispatched records. A dispatcher with the "Can Manage Assignments" FormSpace permission can assign a record to a user or group and reassign it if the original assignee is unavailable. Field users can also claim unassigned records from the Group Inbox. notes, priorities, due dates, and locations to dispatches, giving mobile users the tools they need to efficiently plan their work in the field. Your mobile users can get a higher-level look at their assigned jobs without needing to look at each individual form. Also, they can sort based on the metadata.
Assigning and reassigning control which users are responsible for dispatched records. A dispatcher with the "Can Manage Assignments" FormSpace permission can assign a record to a user or group and reassign it if the original assignee is unavailable. Field users can also claim unassigned records from the Group Inbox. notes, priorities, due dates, and locations to dispatches, giving mobile users the tools they need to efficiently plan their work in the field. Your mobile users can get a higher-level look at their assigned jobs without needing to look at each individual form. Also, they can sort based on the metadata.
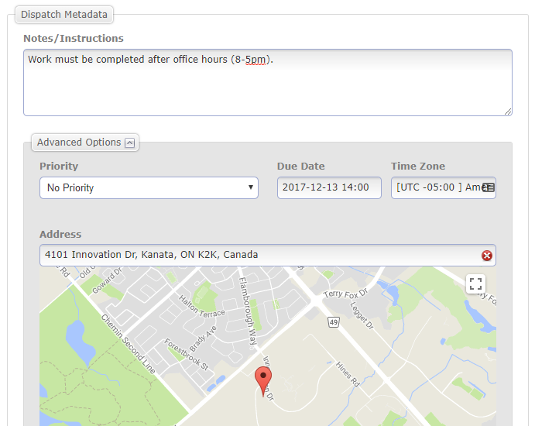
You can dispatch metadata into the following fields:
- Notes: These can be a maximum of 256 characters. Multi-line notes are not supported.
- Priority: This can be Low, Medium, or High. If you don’t assign a priority, the dispatch defaults to No Priority.
- Due Date: If you don’t supply a time zone, the dispatch defaults to the dispatcher's team time zone.
- Location: Enter an address. The Web Portal provides a map so that you can confirm the location.
Steps to dispatch metadata with the Web Portal
Use the additional boxes at the top of the dispatch page to fill in the metadata information. Simply add the information that you need—you don’t have to add all of the metadata.
Field users can find the notes under the dispatched form name in their Inbox
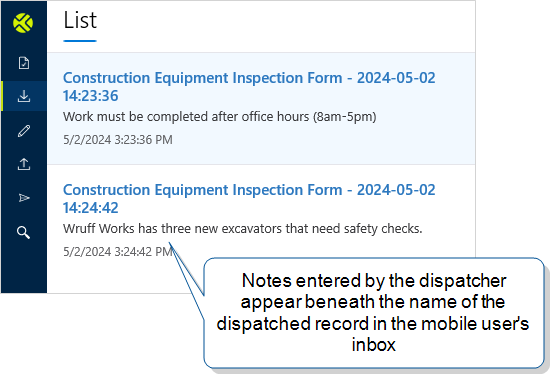
The other types of metadata act as a filter when a user selects a tab at the top of the Inbox
Dispatch an image
By dispatching an image, you can provide details about a job, such as a:
-
Site-specific floor plan.
-
Reference chart.
-
Sketch produced in TrueContext from an earlier site visit or job estimate.
Note:You can dispatch a .jpg, .jpeg, or .png file to an Image, Sketch Pad, or Signature question.
To dispatch an image, select Choose File.
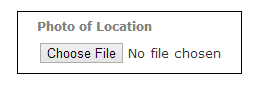
Note:The Web Portal dispatches one image per answer. To dispatch multiple images to an Image or Sketch Pad question, use the TrueContext API and configure the question to accept more than one attachment.
Dispatch a language
Info: The Multi-Language feature is available on the Elite tier. With the Multi-Language feature, you can create a single form and provide it to your field users in multiple languages. You can also set up some types of Documents and files to translate content based on the form’s selected language.
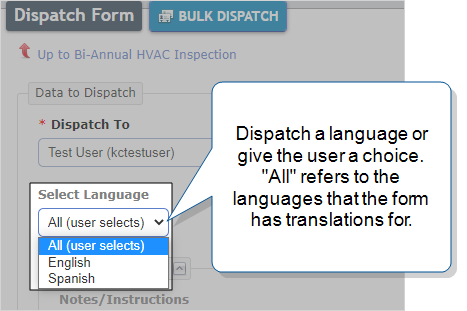
If you set up a form as a Multi-Language Form![]() A Multi-Language Form is a form that’s set up with different translations so that field users can choose their preferred language. Translated content includes page and section names, question text, help text, and other form content., you can preselect a language or let users select a language themselves. Translations for the selected language apply to:
A Multi-Language Form is a form that’s set up with different translations so that field users can choose their preferred language. Translated content includes page and section names, question text, help text, and other form content., you can preselect a language or let users select a language themselves. Translations for the selected language apply to:
-
Page and section headings
-
Question text
-
Manually-defined display values in lists for options-based questions
Options-based questions are questions that display a list of options for field users to choose from. These include Button Group, Card List, Dropdown, Multiselect, and Radio Button questions. -
Question help
-
Custom validation messages
Tip:
Note:Dispatch Destinations do not give you the option to dispatch a language. The user selects a language when they open the dispatched form.
Bulk Dispatch with a CSV File
Need to dispatch
Info:
-
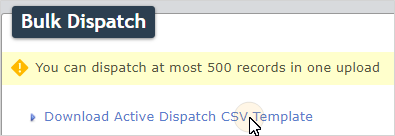
At the top of the dispatch page of the selected form, select Bulk Dispatch.

-
Select the link to download the dispatch template.
-
Starting with the first empty row, enter the user IDs for the users you want to dispatch to.
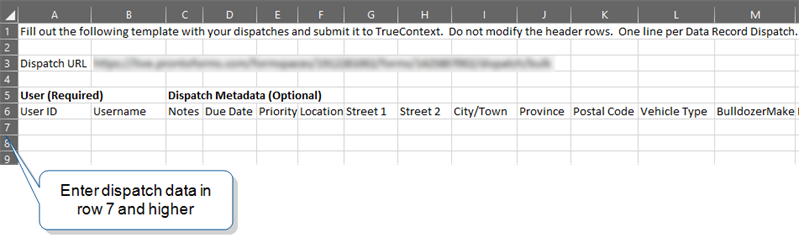
Each row is a new dispatched form.
Info:The topic Supported Question and Data Types for Dispatching describes how to format Barcode Scanner and Geolocation values for bulk dispatch.
-
Enter the data and metadata that you want to dispatch.
-
Does your team have Multi-Language Forms?
-
If no, go to step 6.
-
If yes, and you want to preselect a language, enter one of the supported language codes in the Language Code cell.

Note:Check that the form has a translation file for the selected language.
-
If yes, and you want users to select a language themselves, leave the Language Code cell empty.
-
-
To upload the file that contains the dispatch information, select Choose File, and then select the file.
-
Select Dispatch at the bottom of the page.