Creating and Managing Data Destinations
Available on all tiers:
Contents
Create a Data Destination
-
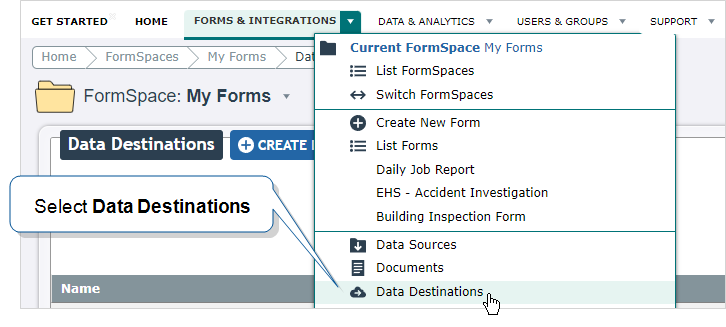
Hover over Forms & Integrations, confirm that you are in the desired FormSpace, and select Data Destinations.
-
Select CREATE DATA DESTINATION.
-
Choose a Data Destination type.
Settings: Destination Basics
These settings are the most common to Data Destinations![]() A Data Destination specifies where to send data from a submitted form. You can use Data Destinations to automate data sharing and storage, routing data to a specific service (such as email or cloud storage) in several different formats.. Other Data Destinations will have specific configurations; these will be covered in their respective Data Destination
A Data Destination specifies where to send data from a submitted form. You can use Data Destinations to automate data sharing and storage, routing data to a specific service (such as email or cloud storage) in several different formats.. Other Data Destinations will have specific configurations; these will be covered in their respective Data Destination![]() A Data Destination specifies where to send data from a submitted form. You can use Data Destinations to automate data sharing and storage, routing data to a specific service (such as email or cloud storage) in several different formats. articles.
A Data Destination specifies where to send data from a submitted form. You can use Data Destinations to automate data sharing and storage, routing data to a specific service (such as email or cloud storage) in several different formats. articles.

-
Name: This is the name that will display in the Data Destination List and when selecting destinations to link in the Form Builder.
-
Unique ID: This is used in Destination Outputs and must be unique per FormSpace
 FormSpaces are where forms are stored and organized in the TrueContext Web Portal. A TrueContext Team may have multiple FormSpaces, depending on their needs. Admins can set FormSpace permissions to control which users have access to the forms in that FormSpace.. It will automatically generate an ID based on the Destination Name if not customized.
 -
Disable this destination: Enable this option if you wish to create the destination without allowing it to accept form submissions -- i.e., it can still be linked in forms, but the destination will not execute if forms are submitted.
-
Auto-Link new forms to this destination: New forms created or imported (in the same FormSpace) will automatically be linked to this Data Destination.
-
On Destinations that accept documents, enabling this option also enables the Auto-Link documents option. When the destination is auto-linked to a form, the Data Destination will automatically be able to send these documents.
-
-
Destination Type: (Salesforce, ServiceNow, and Microsoft SharePoint List destinations only) A Repeatable Destination
A Repeatable Destination is a TrueContext Data Destination that sends data from a Repeatable Section to a field-based, third-party system. sends multiple lines of data from a Repeatable Section A Repeatable Section is a subform that contains a set of related questions. The data captured is “repeating”, because the field user can complete the same subform more than once, which creates multiple entries. to a third-party system. The topics Set Up a Salesforce Repeatable Destination , Set up a ServiceNow Table Data Destination, and Microsoft SharePoint List Data Destination provide detailed steps. -
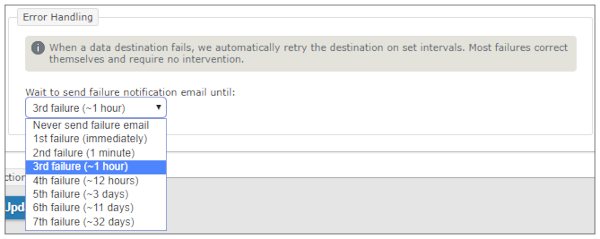
Error Handling: If a form submission initially fails, TrueContext will continue to try to send your form submissions on a regular schedule. If a Data Destination fails multiple times, you will be notified. Most failures correct themselves and require no intervention. TrueContext will start sending emails to the Problem Contact Email addresses if the form submission fails to reach the destination three times, or approximately within an hour. To set your preference, simply select the number of failures before you are notified.
Settings: Filtering
With filters applied, a Data Destination will only execute if specific conditions are met.

Submitted data can be routed to different destinations based on the filtering rules applied. Alternatively, each Data Destination can route the data in a different format to the same destination depending on the data submitted.
Info:When you configure a Data Destination as Repeatable, you can create custom Row Filter Rules for individual rows of a Repeatable Section![]() A Repeatable Section is a subform that contains a set of related questions. The data captured is “repeating”, because the field user can complete the same subform more than once, which creates multiple entries.. This enables you to control which rows the destination sends. The topic Create Filter Rules for Individual Rows in a Repeatable Destination explains Row Filters in more detail.
A Repeatable Section is a subform that contains a set of related questions. The data captured is “repeating”, because the field user can complete the same subform more than once, which creates multiple entries.. This enables you to control which rows the destination sends. The topic Create Filter Rules for Individual Rows in a Repeatable Destination explains Row Filters in more detail.
Click here for more information on Data Destination Filtering.
Settings: File Configuration/Attachments
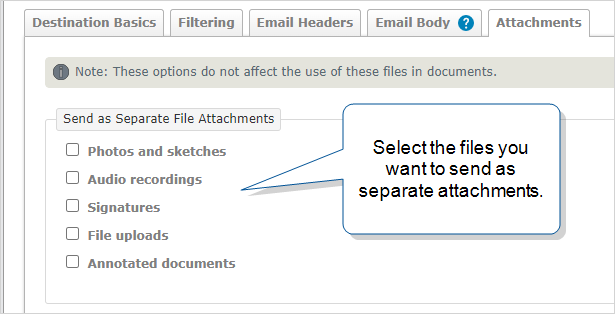
Note: This setting is not on every destination and is called “Attachments” on Email destinations.
Forms often include file attachments such as photos, sketches,
If you want the people receiving the form submissions to be able to view the attached files, be sure to select the files you want to send separately in the Data Destination associated with the form.
If you wish to create a custom naming scheme for these attachments, please read: Attachment File Naming
Settings: Destination Outputs
Destination outputs allow advanced users to coordinate data between two or more destinations. The output from one destination, such as the headers or HTTP status, from one destination can be fed into the input of a subsequent destination using key:value pairs, using Data Reference Expression Language.
This setting is currently limited to certain destinations. For more information on Destination Outputs, please read: Use Response Data Handling to Store Data Received from a Third-Party System.
Viewing the Data Destination pages
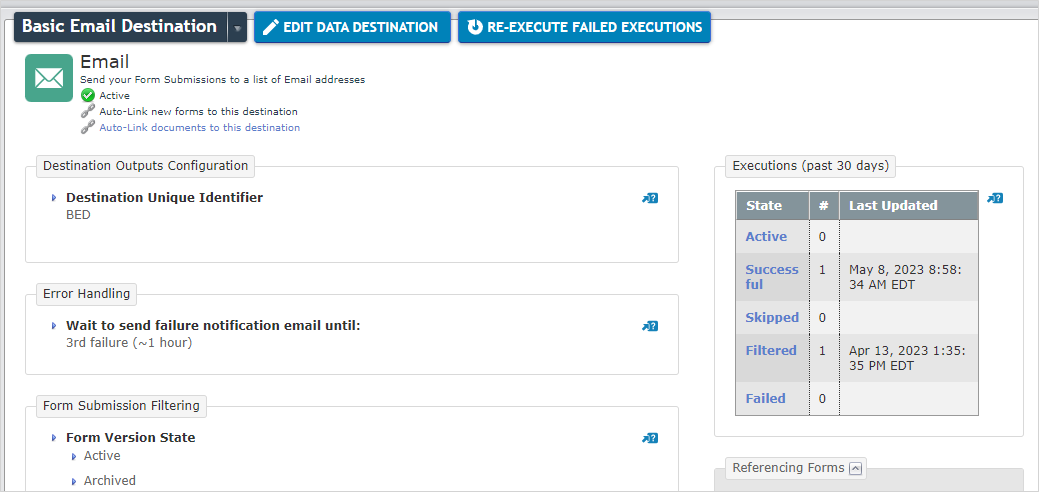
Once you have created your Data Destination, you can view:
-
A summary of the configuration options.
-
The Executions table (limited to the past 30 days to optimize performance).
-
The forms that use the destination.
Update or Delete a Data Destination
You can edit the configuration for your Data Destinations at any time.
-
Hover over Forms & Integrations, confirm that you are in the desired FormSpace, and select Data Destinations.
-
Select the name of the Data Destination that you wish to update.
-
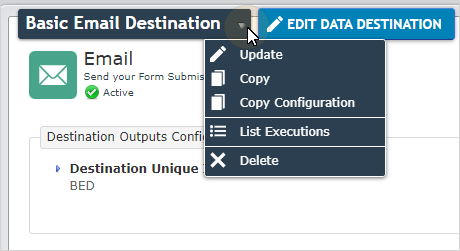
From the DestinationName drop-down menu, select Update or Delete.
Note:You can’t delete a Data Destination if it’s currently in use. You must unlink the Data Destination from all referencing forms before you can delete it. However, you can deactivate a Data Destination to prevent it from executing.
-
After applying the desired changes, select Update.
Disabling Destinations
If you wish to disable a Data Destination even after forms have been submitted to it, select the Disable this destination option.
Note:Data Destinations that are not enabled still appear in the Form Builder Destinations tab but do not receive any form submissions.
Copy a Data Destination
You can copy a Data Destination directly to a new FormSpace or create a copy within the same FormSpace to edit.
| Admin can: | Users with Can Create permissions can: |
|
|
-
Hover over Forms & Integrations, confirm that you are in the desired FormSpace, and select Data Destinations.
-
Select the name of the Data Destination you wish to copy.
-
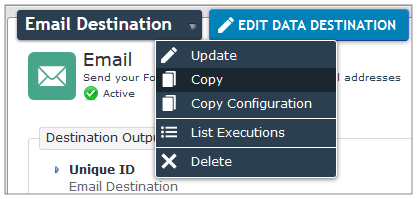
From the DestinationName drop-down menu, select Copy.
-
Select which FormSpace you wish to copy this Data Destination to and name the copied destination.
Copy a Data Destination Configuration
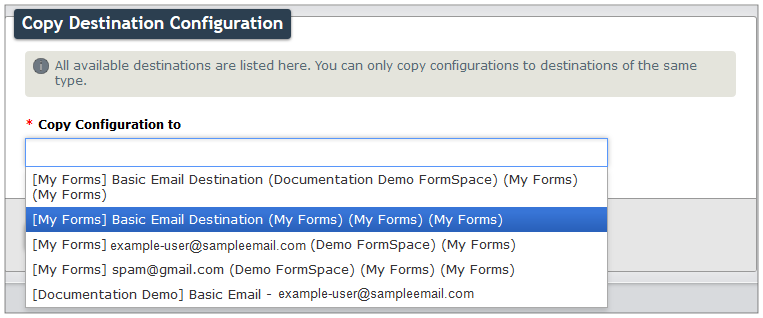
Copying a Data Destination's configuration to a target Data Destination will overwrite and update the target's settings. These settings include Data Record Filtering and any Connections![]() A Connection is an integration point that's used to link a TrueContext Data Source or Data Destination to an external service to import or export data. Data Destinations and Data Sources that share the same external service can also share the same Connection..
A Connection is an integration point that's used to link a TrueContext Data Source or Data Destination to an external service to import or export data. Data Destinations and Data Sources that share the same external service can also share the same Connection..
| Admin can: | Users with Can Create permissions can: |
|
|
-
Hover over Forms & Integrations, confirm that you are in the desired FormSpace, and select Data Destinations.
-
Select the name of the Data Destination you wish to copy.
-
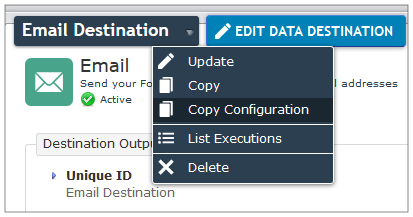
From the DestinationName drop-down menu, select Copy Configuration.
-
From the dropdown menu, select the name of the Data Destination whose settings you are overwriting. You can select multiple Data Destinations to update/overwrite.
View Data Destination executions
The Data Destination Executions page provides a list of executions for a specific Data Destination. The information in the table includes:
-
Success or failure of an execution.
-
When the data was sent:
-
First Run indicates the first time that the destination executed for a particular submission.
-
Latest Run indicates the most recent time that the destination executed for a particular submission. The order of executions in the list defaults to Latest Run.
-
-
The data that was sent (Form Submission reference number).
-
The origin of the data (Form name).
-
Details about failed or skipped executions (Details).
Note:First Run and Latest Run will often show the same timestamp. When a destination re-executes it updates the Latest Run timestamp.
You can view a list of executions in one of two ways:
List all Data Destination executions
-
Go to the Data Destinations page, and then select a destination:
Forms & Integrations > Data Destinations > DestinationName
Result: The system displays the selected destination details.
-
Open the DestinationName dropdown menu and select List Executions.

Result: The Data Destination Executions page opens with a list of all executions for the selected Data Destination.
Tip:By default, the results include the past 30 days. You can change the default list settings to list executions for a different date range. You can also filter by form name and execution state.
-
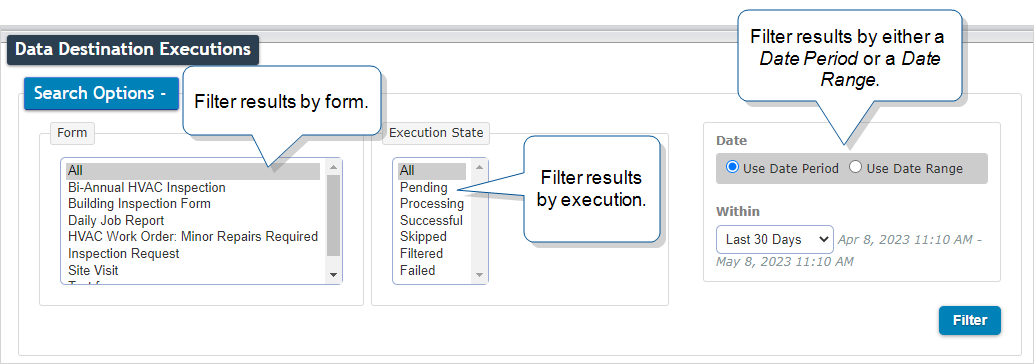
To search by date range, form name, or execution state, expand the Search Options section. Select any or all of the following options, and then select Filter:
-
Form: List All form submissions executed for this Data Destination or select specific forms.
-
Execution State: Select All types of execution states or select specific states.
-
Date: You can use one of the default date periods or specify your own.
-
Use Date Period: Select a preset time period.
-
Use Date Range: Enter From and To dates.
-
-
-
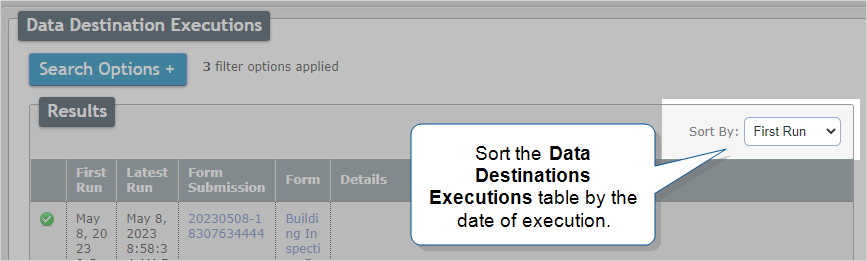
To sort the Data Destination Executions table by the date of execution:
-
Select First Run to list the earliest execution first.
-
Select Latest Run to list the most recent execution first.
-
List all Data Destination executions for a specific execution state
-
Go to the Data Destinations page, and then select a destination:
Forms & Integrations > Data Destinations > DestinationName
Result: The system displays the selected destination details.
-
On the destination details page, from the Executions table, select a state to filter the results.
Note:The statistics in this table are limited to the past 30 days to optimize performance.
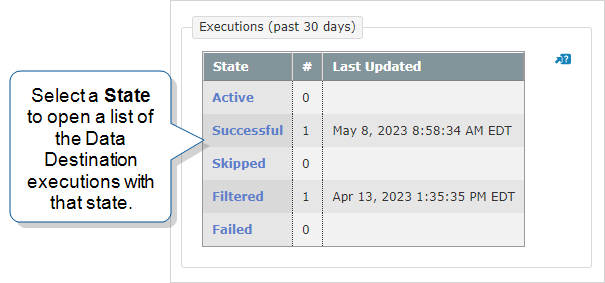
Result: The Data Destination Executions page opens with a list of all executions that match the selected state.
Tip:By default, the results include the past 30 days. You can change the default list settings to list executions for a different date range. You can also filter by form name and other execution states.
-
To search by date range, form name, or execution state, expand the Search Options section. Select any or all of the following options, and then select Filter:
-
Form: List All form submissions executed for this Data Destination or select specific forms.
-
Execution State: Select All types of execution states or select specific states.
-
Date: You can use one of the default date periods or specify your own.
-
Use Date Period: Select a preset time period.
-
Use Date Range: Enter From and To dates.
-
-
-
To sort the Data Destination Executions table by the date of execution:
-
Select First Run to list the earliest execution first.
-
Select Latest Run to list the most recent execution first.
-
Re-Execute a Failed Execution
If a Data Destination execution has failed, the List Executions page will contain details regarding why. Once the source of the error has been corrected, failed executions can be re-executed. Open the Data Destination Configuration page and select Re-Execute Failed Executions.

Add a Destination to a Form
Info:This method creates a new form version. If you want to send data from past form submissions to an added Data Destination, follow the steps to Link Data Destinations to previous form versions.
To add a Data Destination to your form in the Form Builder:
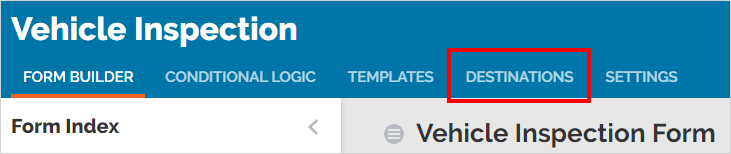
-
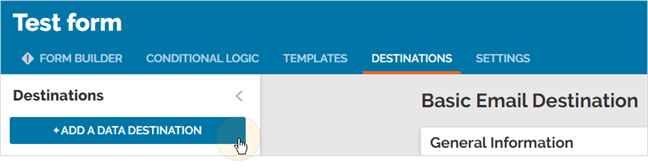
Select the destinations tab from the top navigation pane.
-
Select the Add a Data Destination button from the side navigation bar.
-
Select the appropriate Destination from the dropdown.
-
Configure the options based on the information in the topic Connecting Destinations and Documents to Forms
Link a New Destination to Previous Form Versions
After you’ve deployed a form, you might want to return to a previous form version and
-
send existing submissions to a new destination, or
-
attach a different document to an existing destination.
You can attach Data Destinations and documents to a previous form version. By doing this, you can resend data from all previously submitted forms of that version to the new or modified Data Destinations.
Info:The topic Link Data Destinations to previous form versions describes how to link a Data Destination or document to previous form versions.
Note:Be careful if you add an email destination to a previous form version—the recipients could receive thousands of emails.
Testing and Troubleshooting Data Destinations
Data Destinations should be configured and tested carefully before using them in production. This is key to ensuring that TrueContext data is received correctly. Please consult the recommendations for testing and troubleshooting Data Destinations.