Set up a Salesforce TrueContext Demo
This topic describes how to use the TrueContext AppExchange package to demo a full workflow with Salesforce and TrueContext. It also describes how to customize your workflow by creating or editing components in TrueContext.
Contents
Install the Salesforce TrueContext AppExchange Package
The TrueContext AppExchange package includes everything you need to seamlessly integrate Salesforce with TrueContext. Download the package and follow the steps in the Quickstart page to:
-
Set the credentials for a TrueContext trial account.
-
Open preconfigured forms in the Mobile App.
-
Populate answers in the form with data from Salesforce records.
-
Automatically create Salesforce records that include data from submitted forms.
To install the TrueContext package, visit the TrueContext listing in AppExchange, and then select Get It Now.
Set up an App Extension to launch the TrueContext Mobile App from the Salesforce Field Service app
If your workflow includes the Salesforce Field Service app, you can:
-
Set up an App Extension to launch the TrueContext Mobile App and open a form.
-
Prepopulate the form with data from a Salesforce record.
-
Configure an App‑to‑App call (deep link) to return to the Field Service app when the user submits the form.
-
Populate fields in your Salesforce record with data from the submitted form.
Customize your workflow in TrueContext
The TrueContext AppExchange package includes everything you need to get started with TrueContext. If you want to set up a custom workflow, you can edit the components included in the package. You can also create your own components.
To customize your workflow, you need access to the TrueContext Web Portal. Sign in with the credentials you set when you installed the TrueContext package.
Create or edit forms
The TrueContext AppExchange package includes preconfigured forms. To customize your workflow, you can make changes to the existing forms (Forms & Integrations > List Forms > Form Name > EDIT FORM). You can also create your own forms.
Tip:If you want to edit an existing form without losing the original, you can copy the form and then edit it.
When you customize your forms, you can:
-
Add different question types depending on the data you want to collect.
-
Structure your form using pages and sections to enhance your technicians’ experience.
-
Implement your business logic using Conditional Logic and Answer Exceptions.
-
Use Help Options to give your users additional context.
-
Configure your form settings to change your workflow and control how your users can access the form.
Create or edit Salesforce Data Sources
Salesforce Data Sources![]() Data sources, also known as "Lookups", are external sources of data that you upload or connect to TrueContext. You can reference this data in a form to populate answers or answer options. Data sources save typing, reduce errors, and make it easy to provide mobile users with only the relevant, most current data. retrieve data from your Salesforce records. You can use this data in TrueContext to prepopulate answer options in Dropdown, Multiselect, or Radio Button questions.
Data sources, also known as "Lookups", are external sources of data that you upload or connect to TrueContext. You can reference this data in a form to populate answers or answer options. Data sources save typing, reduce errors, and make it easy to provide mobile users with only the relevant, most current data. retrieve data from your Salesforce records. You can use this data in TrueContext to prepopulate answer options in Dropdown, Multiselect, or Radio Button questions.
You can use two different Data Sources in TrueContext:
| Data Source |
How it works | Use it for |
|---|---|---|
| Salesforce Report | Retrieves data from Salesforce reports | Reports in a tabular format with no more than 2000 rows |
| Salesforce Query | Uses Salesforce Object Query Language (SOQL) | Any Salesforce Standard, Custom, or Big Object with any number of rows |
Your TrueContext trial account includes preconfigured Salesforce Query Data Sources that you can customize.
Create or edit Salesforce Data Destinations
Salesforce Data Destinations![]() A Data Destination specifies where to send data from a submitted form. You can use Data Destinations to automate data sharing and storage, routing data to a specific service (such as email or cloud storage) in several different formats. use data from submitted forms to create or update records in Salesforce.
A Data Destination specifies where to send data from a submitted form. You can use Data Destinations to automate data sharing and storage, routing data to a specific service (such as email or cloud storage) in several different formats. use data from submitted forms to create or update records in Salesforce.
You can use six different Data Destinations in TrueContext:
| Data Destination |
How it works |
|---|---|
|
Salesforce Account Salesforce Case Salesforce Contact Salesforce Lead |
|
| Salesforce Standard, Custom or Big Object |
|
| Salesforce Apex REST |
|
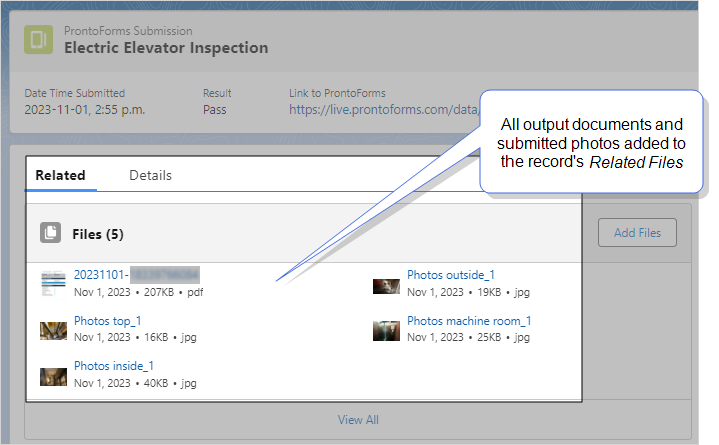
Your TrueContext trial account includes a preconfigured Salesforce Standard, Custom, or Big Object Data Destination. This Data Destination sends data to a custom object that stores each submitted form as a record. You can customize this Data Destination, or you can create your own Data Destination.
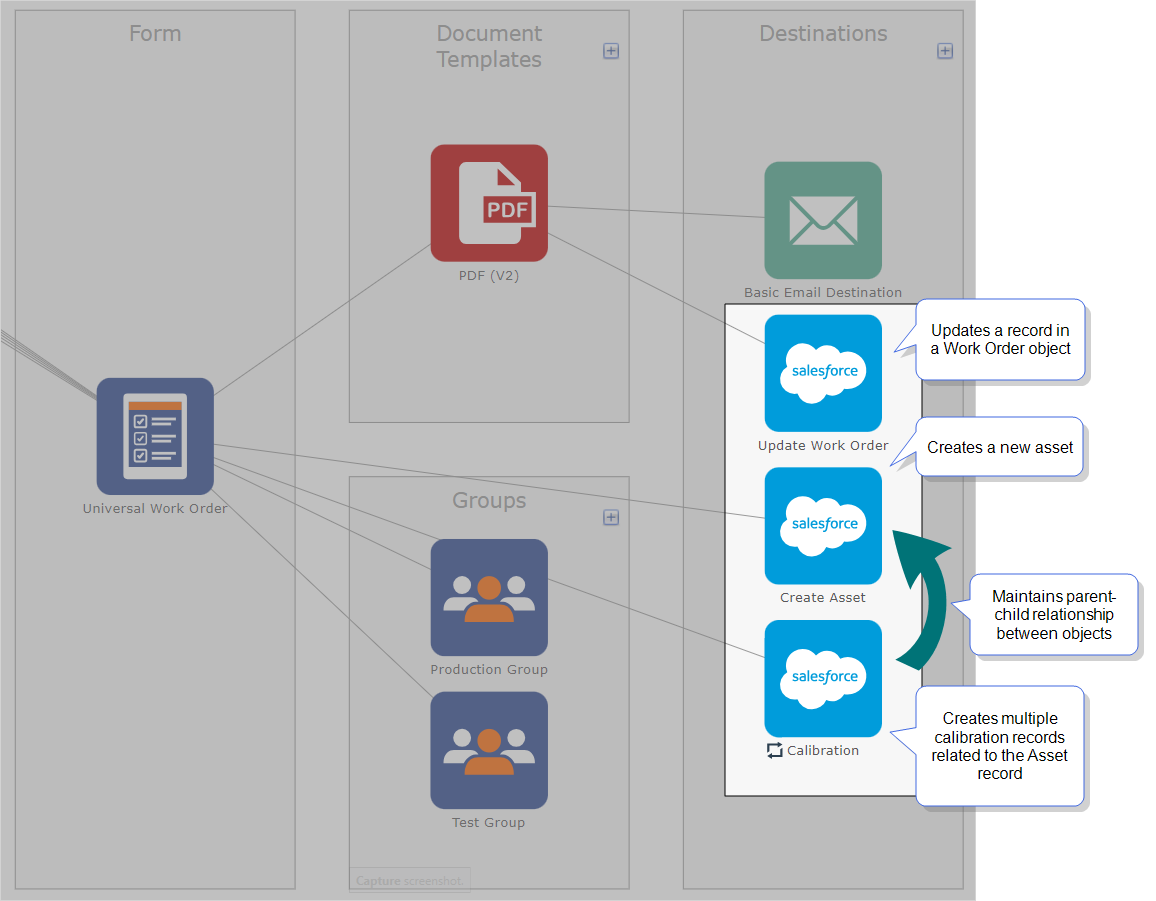
Work with parent and child records
TrueContext supports creating or editing records in Salesforce linked by a parent-child relationship.
Tip:Repeatable Destinations enable you to create or update multiple child records linked to a parent object in Salesforce.
The way you configure your Data Sources and Destinations depends on whether the parent and child records exist.
| If the parent record... | And the child record... | Then... |
|---|---|---|
| Exists | Exists | They’re already linked in Salesforce. Use a different Data Destination to update each record. |
| Exists | Doesn’t exist |
|
| Doesn’t exist | Doesn’t exist |
|